Real Peak work · Rocklin, California · Exterior wood repair
Fascia Repair Project in Rocklin, CA
This Peak Construction project archive documents fascia work at a Rocklin home. Here is what the project photographs establish, why nearby roof-edge components matter, and what homeowners should understand before approving an exterior wood repair.
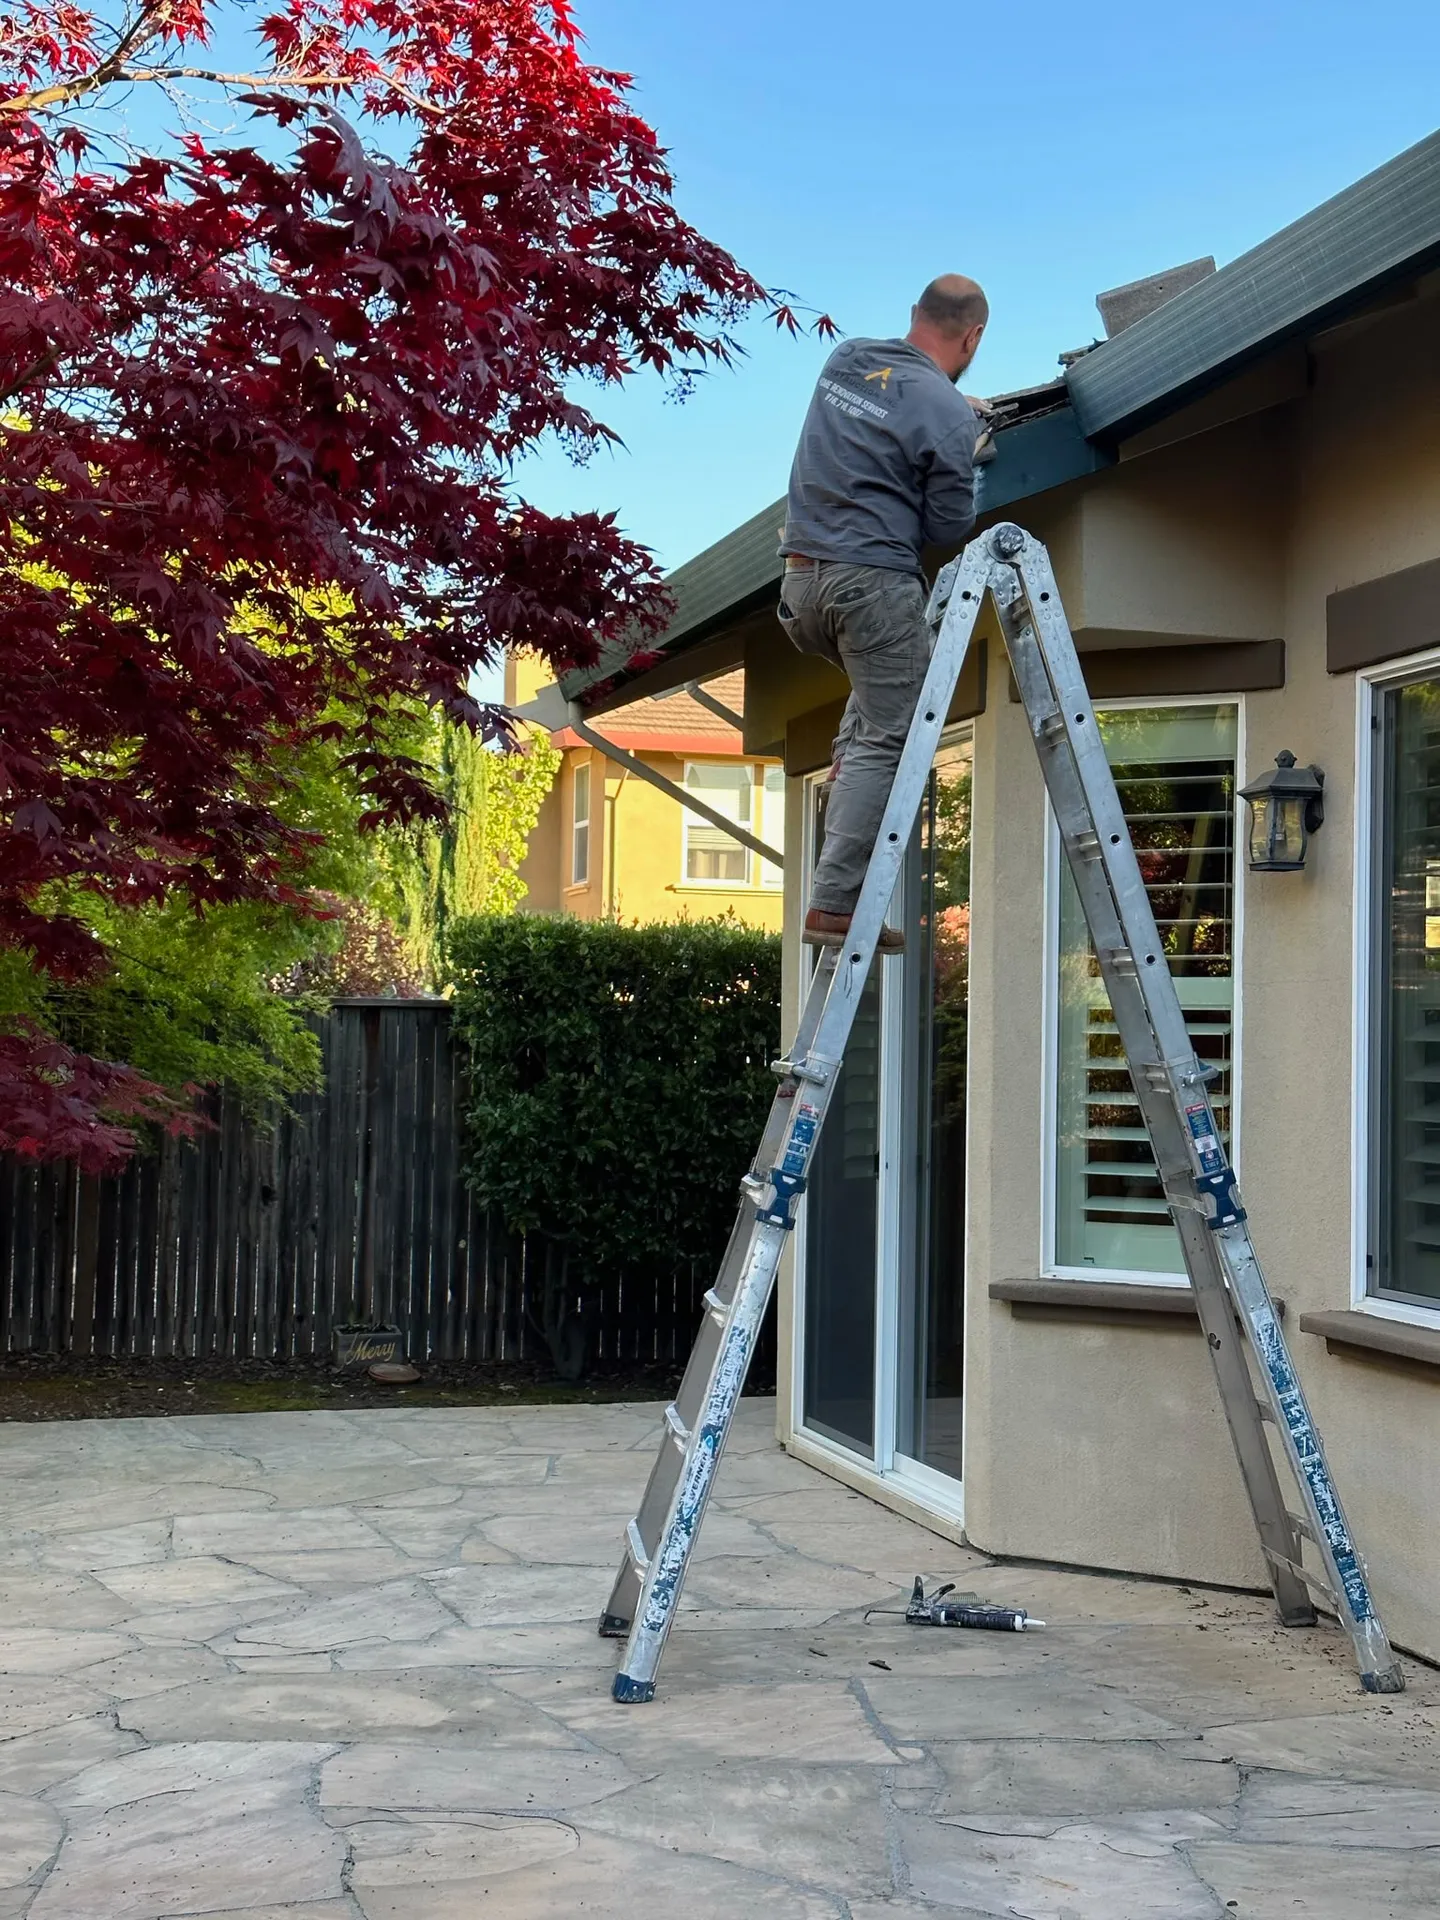
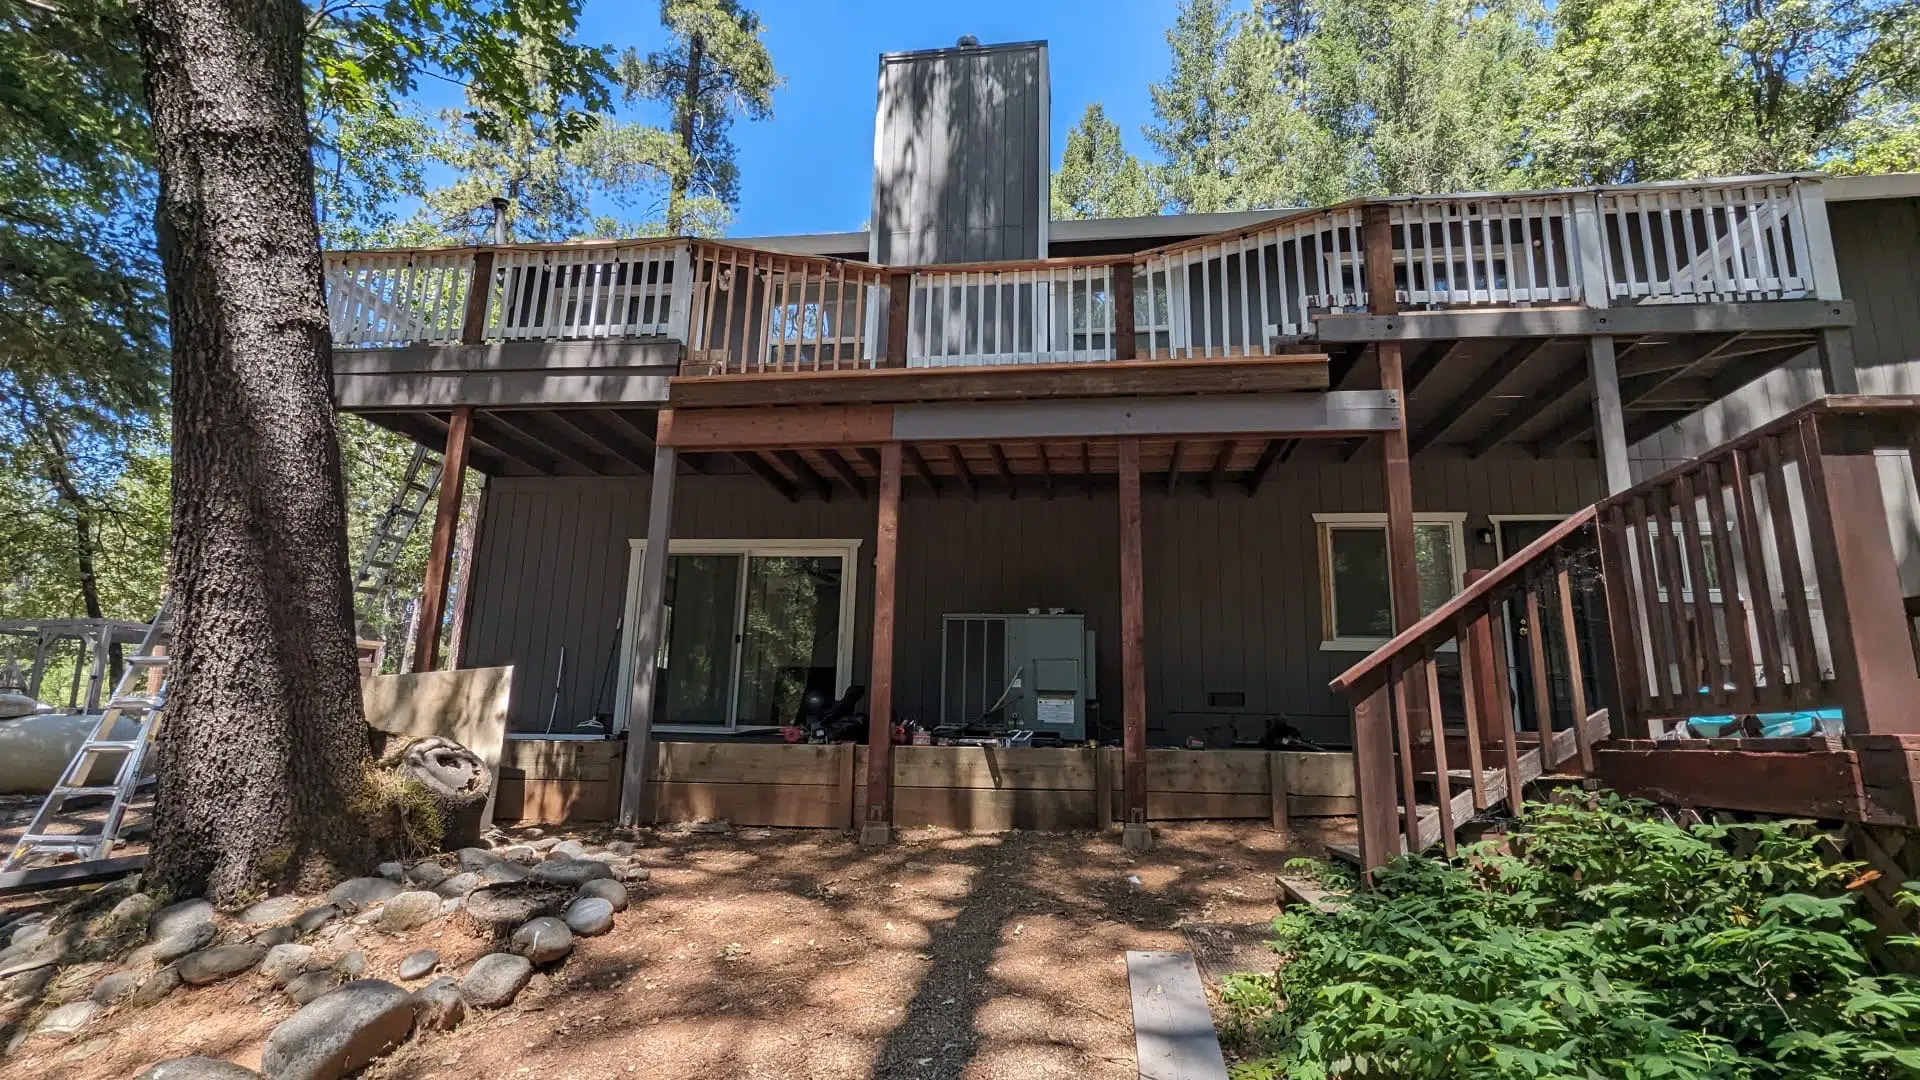
Peak’s project gallery identifies the work as a fascia repair in Rocklin. The available media show roof-edge access with ladders and exterior carpentry activity. That is first-party evidence of the work location and type—not proof that every adjacent framing member was damaged.
Fascia is the finish board at the edge of a roof, commonly where gutters attach. Once the surface becomes visibly worn, split, soft or repeatedly wet, a contractor needs to distinguish simple coating failure from deterioration of the wood itself. The scope can change depending on what is found under nearby trim and gutter connections.
For readers comparing symptoms before calling a contractor, Peak’s fascia and eaves warning-sign guide covers peeling paint, staining, sagging gutters and deterioration near rafter tails. This Rocklin page instead documents a specific item of Peak project work.
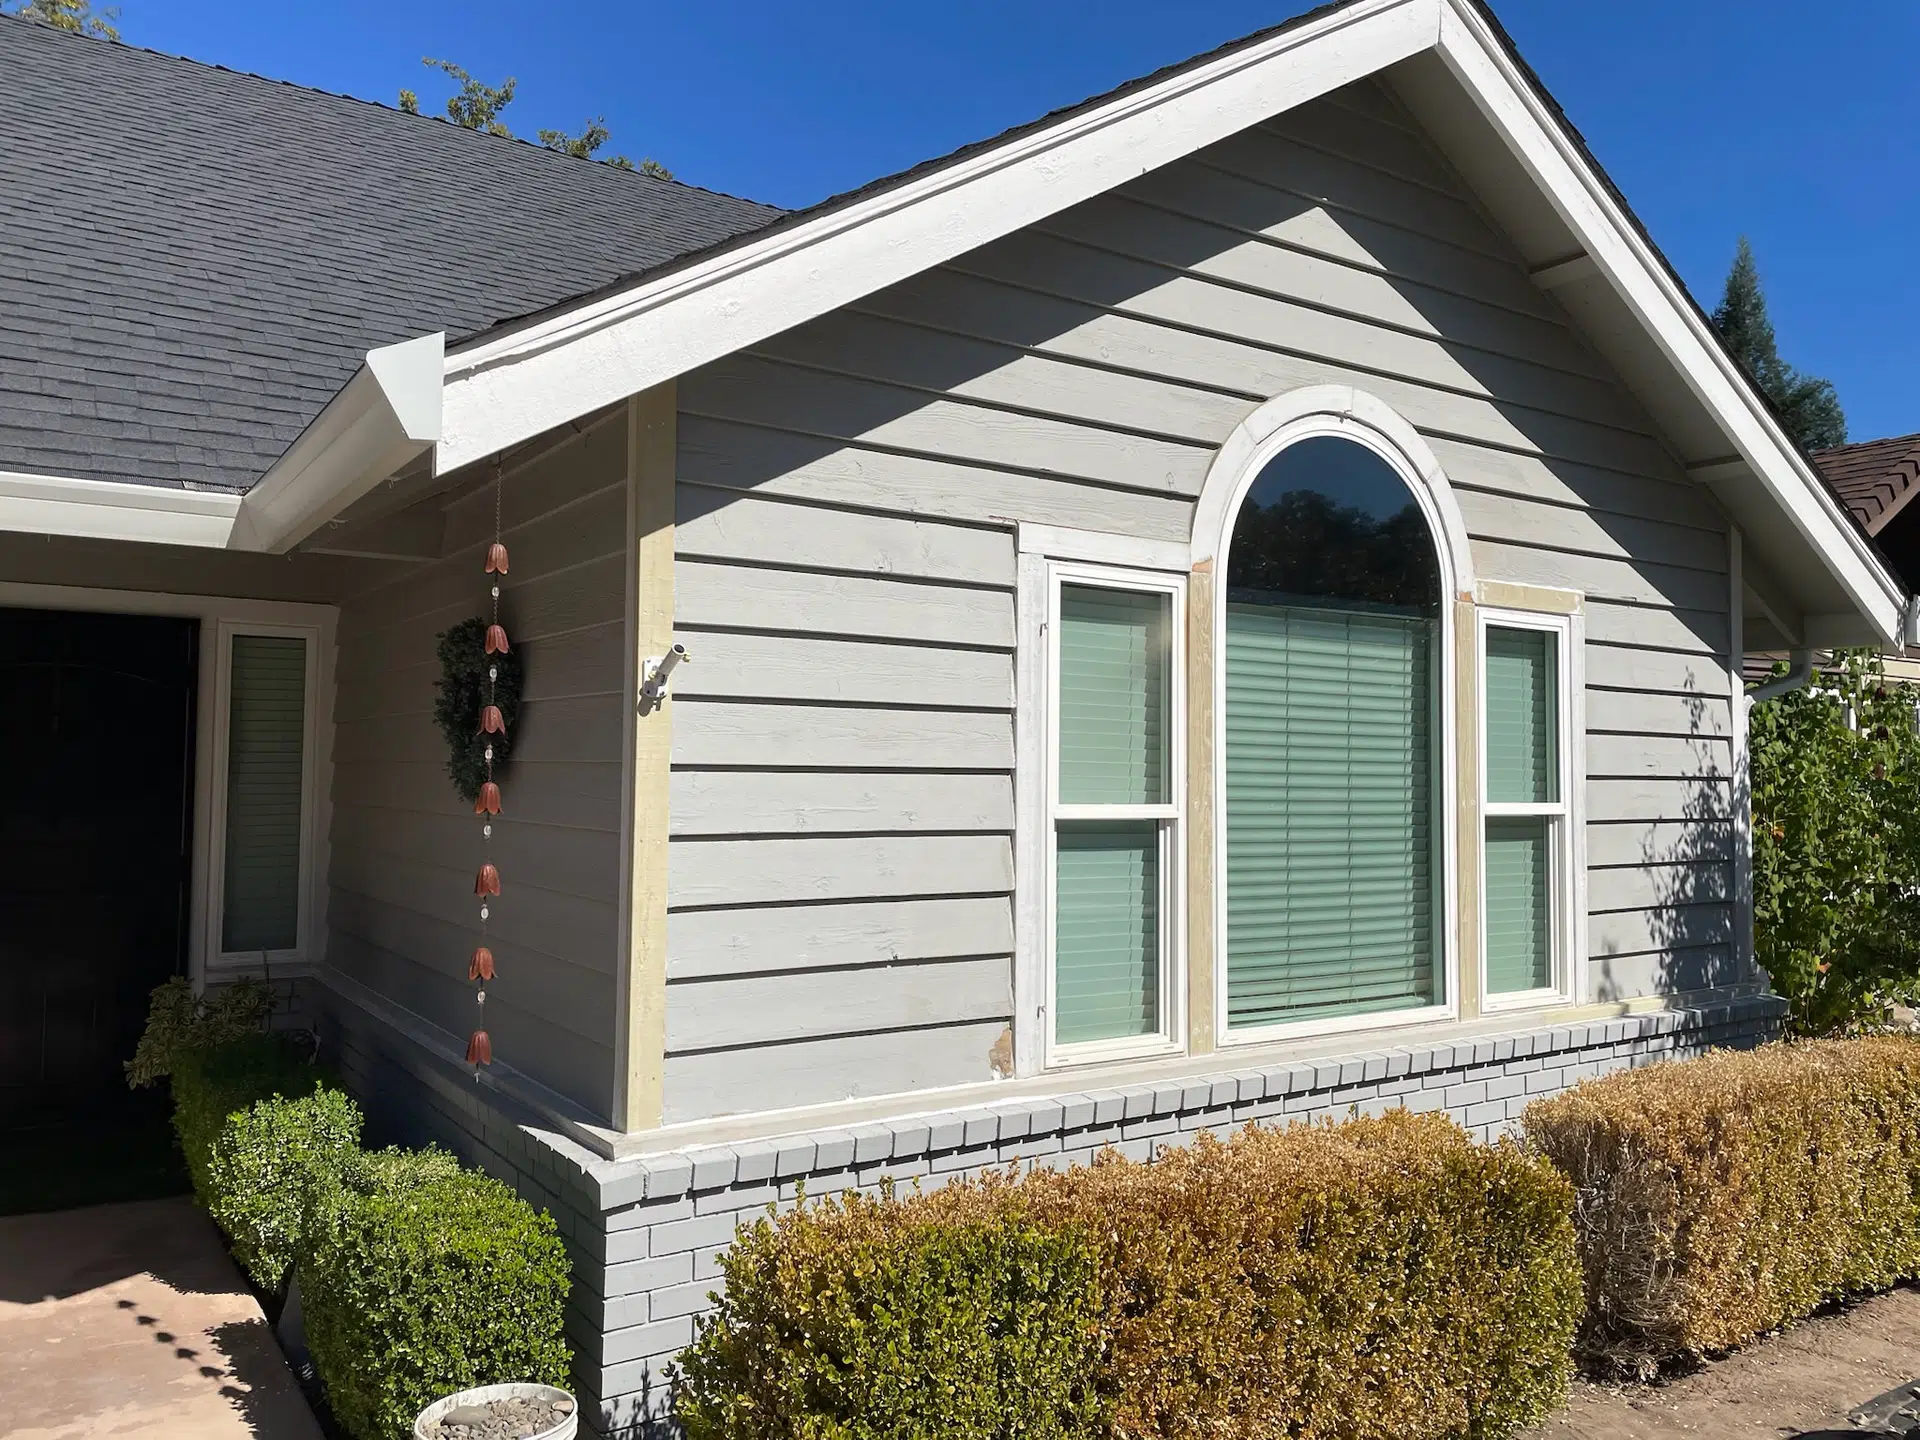
Peak Construction archive: photograph labeled “fascia board — Rocklin.” The filename and existing project gallery establish the association with Rocklin.
02 / Adjacent components
Why the fascia board cannot be evaluated in isolation
A / Gutter edge
Gutters and fasteners
Look for overflow, weakened attachments, staining behind a gutter or a gap that repeatedly directs water toward the board.
B / Eave underside
Soffits and rafter tails
Damage at adjoining soffits or supporting wood can make a small fascia-only replacement inadequate. Structural members require a separate assessment.
C / Water pathway
Drip edge and flashing
Roof-edge drainage details should direct runoff outward. Replacing wood alone does not correct an ongoing leak or poorly directed water.
These are the checks relevant to a repair of this type, not unverified claims that all three systems failed at the photographed Rocklin property. A photo cannot establish concealed wood condition, flashing performance or the full scope approved by a homeowner.
03 / Repair approach
From damaged fascia to a repair tied into sound exterior wood
Once the affected area is accessible, the priority is to agree which components are being removed, which nearby wood needs further examination, and how the finished section will shed water. The exact Rocklin job records available here do not include a line-by-line construction log, so the sequence below explains a responsible fascia-repair scope rather than claiming every step was photographed on this house.
1
Document
Record the affected roofline, the condition of the board, gutter alignment and safe access.
2
Open and assess
Remove agreed damaged finish where appropriate and check the soundness of adjacent wood before closing the area.
3
Repair fascia
Replace or repair affected exterior wood within the approved scope and restore the board’s supporting connections.
4
Finish and verify
Address agreed joints, coating, gutter attachment and water-shedding details, then review the completed section.
Project documentation
What the Rocklin project record confirms—and what it does not
Peak’s public projects listing names the **Rocklin Fascia Repair** as a completed job. The media archive includes multiple files explicitly labeled as Rocklin fascia work, including a photograph of work being performed at roof height. This supports an authentic local project case rather than a generic city landing page.
The source files available for this article do not establish the length of fascia replaced, the precise cause of damage, any permit number, the paint system, final contract value or a verified side-by-side “before/after” sequence. We are not attributing those details to this property.
If you need a property-specific repair plan in Rocklin, visit our Rocklin exterior repair page or send the problem-area photos directly to Peak.
Additional Rocklin fascia-board archive image. No unverified structural diagnosis or completion-stage label is assigned to this photograph.
04 / Result and homeowner next step
A completed Rocklin fascia repair in Peak’s project portfolio
Peak’s published project catalog identifies this fascia repair as completed. Its accompanying images make the work type and location concrete; however, they do not provide a reliable final-finish comparison. We therefore document the reported project completion without inventing measurable improvements or declaring that unseen damage was discovered or repaired.
What a homeowner should take from this case: the right quote separates visible fascia repair from any work needed on gutters, soffits, rafter tails or flashing. Ask what will be checked, what is included, how concealed damage is handled and what finish is expected.
For pricing context, consult Dry Rot Repair Cost in Sacramento. It discusses broad third-party market estimates, not this Rocklin project’s invoice or a fixed Peak price. For a project-specific figure, Peak needs to review your home and the agreed scope.
Does peeling paint mean the Rocklin fascia is rotten?
Not necessarily. Paint wear and actual decayed wood can look similar from a distance. Repeat staining, deformed boards and loosened gutter attachments are reasons to request a closer evaluation.
Can fascia be repaired without replacing the whole roof?
Sometimes. An accessible damaged fascia board can be repaired locally when adjacent roof-edge support and drainage conditions are sound. The actual scope depends on inspection and how the roofing and gutter edges are built.
Should gutters or rafter tails be checked?
Yes, when relevant to the visible problem. Fascia commonly supports gutter attachment, while rafter tails form part of the roof-edge framing. A contractor should clarify whether any adjacent members are in the agreed repair scope.
How can I request a fascia repair estimate in Rocklin?
Use Peak’s free estimate request and include the property ZIP code, photos of the damaged fascia and nearby gutter, and whether the issue appeared after rain.
Peak Construction · Rocklin & Greater Sacramento
Have a similar damaged fascia board?
Send us a photo of the roof edge, approximate location and what you have noticed. Peak can help review the next step toward a free exterior wood repair estimate.
A soft window sill, peeling trim or damaged door jamb can be the visible end of a moisture problem. Learn the warning signs, which parts may be affected and when a focused repair—or a closer look behind the finish—makes sense.
Is that damaged trim just cosmetic—or a warning about hidden wood?
It depends on where moisture reached the opening and how much sound wood remains. Weathered paint on a sound board may need preparation and refinishing. A rotten exterior sill, a spongy jamb or repeatedly wet trim calls for a closer inspection. Decay that extends into wall sheathing or structural framing is a different kind of repair.
Windows and doors interrupt the wall’s moisture-management layers. Water can enter at upper joints, flashing transitions, sill corners or nearby cladding and travel behind material that still looks acceptable. In a Sacramento-area home, seasonal rain, roof runoff or irrigation may reveal a long-standing weakness in those details; the damage is not necessarily coming from the closest visible stain.
A useful first question: Is the window or door itself failing, or is the surrounding wood and weatherproofing the issue? Replacing an otherwise working unit may not solve water intrusion if the opening beneath it is still damaged.
Warning signs
Six places to look for wood rot around openings
01 / Window sill
Soft or split sill corners
Exterior sill corners and joints receive runoff. Cracks, softness or repeated paint failure here warrant closer review.
02 / Side trim
Peeling or swollen casing
Bubbling paint, warped exterior trim and darkened end grain can indicate repeated wetting, but do not alone prove hidden rot.
03 / Door jamb
Damaged lower jamb ends
The bottom few inches of a door frame may become vulnerable near the threshold, porch or splashback area.
04 / Threshold
Wet or loose entry threshold
Moisture at the exterior door sill can reach subfloor or adjacent framing, especially when water does not drain outward.
05 / Interior finish
Stains below the opening
Interior drywall discoloration or baseboard swelling can signal a leak path, condensation or another moisture source.
06 / Adjacent siding
Recurring damp patches
Stains and gaps just beside a window can suggest that water is getting behind cladding or flashing details.
These observations are screening clues, not proof of fungal decay, termites, mold or a structural problem. A qualified inspection determines what the material actually needs.
Know what is damaged
Window trim, sill, jamb and wall framing: why the distinction matters
Part
Role
What a repair may involve
Exterior trim / casing
Covers joints and gives the opening a finished edge.
Targeted trim replacement may be appropriate if the opening beneath remains sound and protected.
Window sill / sill extension
Supports or sheds water at the bottom of a window assembly, depending on the design.
Damaged sills require attention to drainage and the condition of the underlying assembly, not merely a fresh coat of paint.
Door jamb / threshold
Frames an entry, supports closing and weather sealing at the edges and bottom.
Lower jamb repair may be localized; soft threshold support or subfloor changes the scope.
Sheathing, studs and rough opening
Wall enclosure and underlying structural support.
Concealed deterioration may require controlled removal of adjacent finishes and a more involved repair.
Flashing / drainage plane
Directs incidental water down and back outdoors.
Correcting the water path may be essential even where most visible wood is still in good condition.
The U.S. Department of Energy’s Building America guide to flashing windows and doors explains why lapped flashing and drainage at openings matter. Exact methods depend on the installed assembly and applicable requirements.
Real Peak Construction archive
Why the view behind the trim can change the job
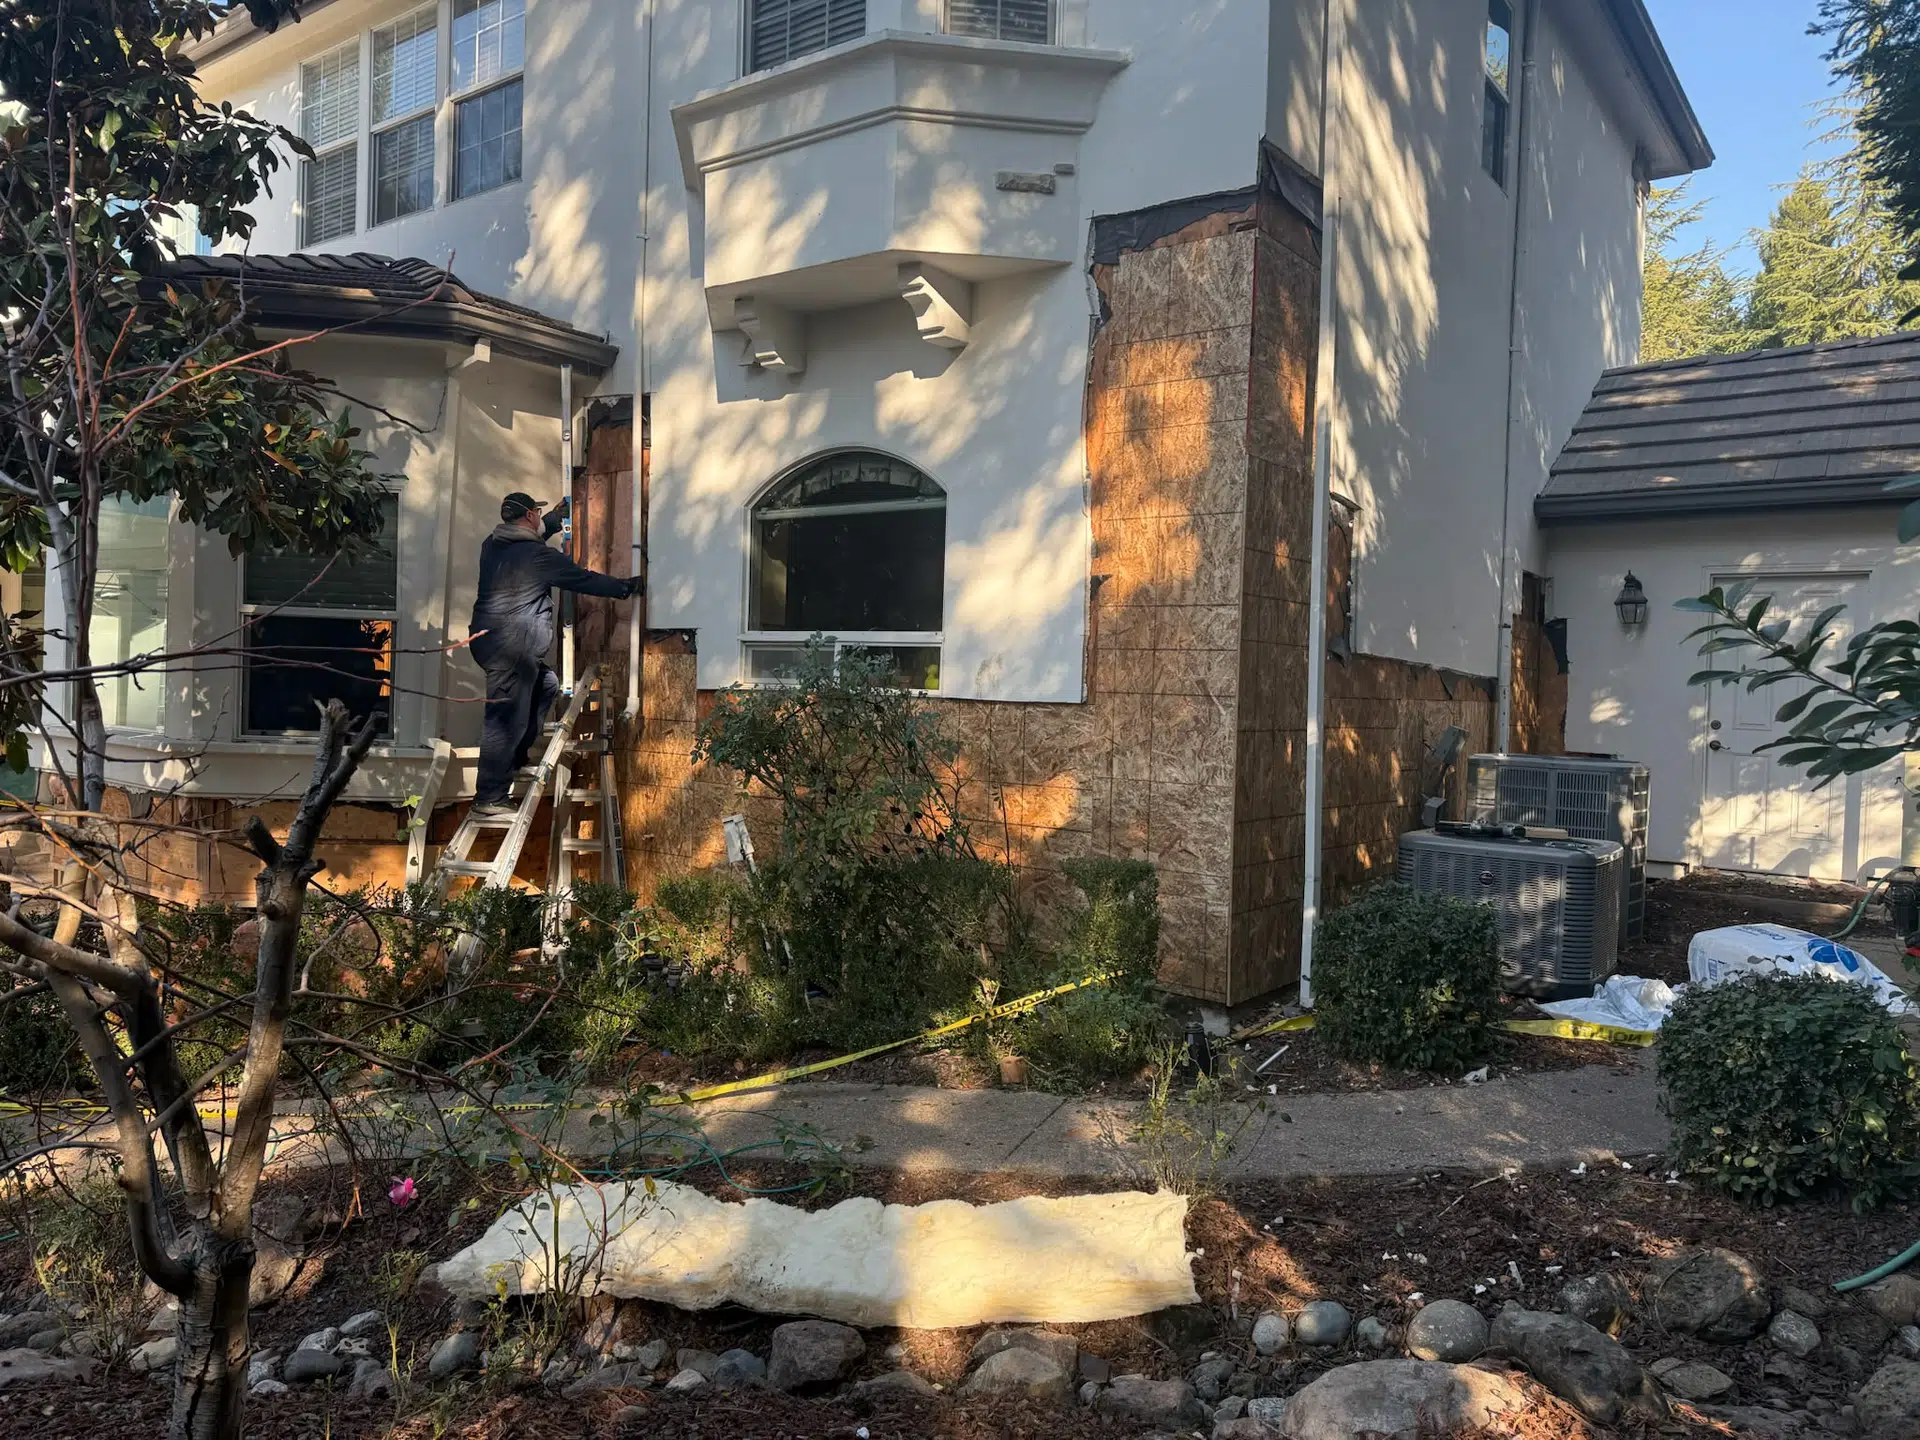
Peak’s public El Dorado Hills dry rot repair project documents opened exterior-wall areas and investigation of concealed deterioration near wall and window transitions. It illustrates an important limit of a photo-based estimate: the exposed area can show only one part of the problem until materials are opened and assessed.
Peak’s own archive also includes images labeled as window trim repair in Roseville. We use these as visual context, not as proof of a particular hidden cause, repair price or outcome beyond what the records confirm.
Peak Construction archive: window trim repair, labeled Roseville. The image is not presented as an engineering diagnosis or priced invoice.
Trace the water path
How moisture gets behind windows and exterior doors
A / Top of opening
Failed head flashing
Water running down the wall can enter above a window or door when the upper flashing and wall water barrier are not integrated correctly.
B / Lower corners
Missing or failed sill pan
Sill-area drainage is intended to direct incidental water outside rather than into the underlying framing or interior floor.
C / Adjacent surfaces
Joints, siding or splashback
Runoff from another wall section, irrigation spray or poorly detailed trim joints can wet an opening repeatedly.
One important caution: do not simply caulk every visible gap. Some windows have designated weep or drainage openings that must remain clear. Sealing them can trap the very water the assembly is designed to release. The DOE guide to finding missing flashing discusses these warning signs.
A stain below a window can also come from condensation, plumbing or another source. The right repair should follow the actual water path, not just the closest damaged board.
Peak Construction project archive: exterior window and wall repair photograph. The visible condition alone does not establish the extent of concealed damage.
Choose the scope
Can you repair the wood without replacing the whole window or door?
Sometimes. If the window or door works properly and deterioration is limited to replaceable exterior trim, a localized repair may solve the damaged-material issue once the moisture source has been corrected. The opening itself still needs an adequate drainage and flashing system.
If the sill, door threshold, supporting frame or wall framing has deteriorated, more extensive work may be needed. A homeowner should not assume that replacing the window fixes damaged framing—or that a cosmetic patch is sufficient for a failed sill.
Different homes also have different materials and opening designs. An accurate proposal should state whether the existing unit remains, what components will be removed and how the repaired opening will be weather protected. Read the DOE window rehabilitation guide for the distinction between a deteriorated sill, casing and decorative trim.
A practical process
Four steps from visible damage to an agreed repair scope
1
Document
Show the full opening, visible deterioration and recurring moisture symptoms. Describe where and when leaks occur.
2
Inspect
Review trim, sill, jamb, threshold, nearby siding and water-shedding details for evidence relevant to the scope.
3
Clarify hidden work
Agree how any necessary selective opening or newly discovered damage will be documented and approved.
4
Rebuild and protect
Replace compromised material within the agreed scope and restore appropriate flashing, finish and drainage details.
These are homeowner planning steps, not a promise that every job follows an identical sequence. Permits and specialized evaluation may be required depending on actual conditions.
Compare repair proposals
What belongs in a window or door wood-rot estimate?
Exact opening and the surfaces or framing members included
Repair versus replacement of trim, sill, jamb, threshold and/or window or door unit
Access and controlled removal of adjoining cladding, if necessary
Moisture-source investigation, flashing and drainage work within scope
Replacement materials, finishes, paint and color-matching expectations
How concealed deterioration, approvals and change orders are handled
Permit/inspection responsibility and written warranty terms where applicable
What about cost?
Replacing a short run of decorative trim is a different scope from opening the wall, rebuilding a damaged rough opening and resetting a window. Height, access, materials and hidden deterioration can change the price.
For clearly labeled third-party market guidance on exterior wood decay repairs, see our Dry Rot Repair Cost in Sacramento article. Those ranges are not Peak bids or fixed price promises.
Warning signs can include flaking finishes, soft or crumbling wood, split corners and persistent wetness. They do not prove the extent of decay or whether the underlying framing is affected. Avoid invasive probing or opening finishes without suitable safety precautions.
Can I replace a rotten window trim board without replacing the window?
Possibly, if the window assembly and rough opening remain sound and the moisture problem is corrected. A contractor should confirm whether the sill, flashing or sheathing is also damaged.
Why is the bottom of my exterior door jamb rotting?
Lower jamb ends can be repeatedly exposed to runoff, splashback or moisture at a failing threshold. The source should be identified before replacing or refinishing the affected material.
Will caulk stop water from entering around a window?
Caulk alone is not a substitute for a functioning flashing and drainage system. Do not block a window manufacturer’s drain or weep openings. Poorly placed sealant may trap moisture.
Is wood rot always dry rot?
No. Several types of moisture-related wood decay exist, and staining can also indicate problems unrelated to rot. For the differences among decay, mold and insect damage, see our damage comparison guide.
How do I get a Sacramento-area repair estimate?
Send Peak Construction photos, the ZIP code and a short description using the estimate request form. A property-specific scope depends on what can be safely inspected and what remains concealed.
Peak handles exterior wood and dry rot repairs for homeowners in North Highlands and the Sacramento area. Send a few photographs and the location. We can help determine the next appropriate step toward a free estimate without assuming hidden damage from one picture.
Rotted Fascia & Eaves in Sacramento: Signs, Causes and Repair Options
Peeling paint near a gutter can be a maintenance issue—or a clue that wood behind the roof edge has deteriorated. Learn what the visible signs mean, when a board can be replaced locally, and what should be checked before the repair is scoped.
What should you do when a fascia board starts rotting?
Start with the water path, not the paint color. A soft or crumbling fascia board may need replacement, but the assessment should also consider the gutter attachment, adjacent soffit, roof-edge flashing and rafter tails. If the adjoining wood is sound, a localized repair may be practical. If deterioration reaches supporting members, the job can be substantially different.
On Sacramento-area homes, moisture may reach roof-edge wood during seasonal storms, through overflowing gutters, failed joints or other roof-edge details. A stain or peeling paint is not proof of structural damage, but repeated paint failure, sagging gutter fasteners or visibly misshapen wood are reasons to arrange a closer look.
Do not climb onto a roof or lean from a ladder to test questionable wood. From the ground, take wide and close-up photos, note when the staining appears, and keep people clear if material seems loose.
Know the parts
Fascia, soffit and rafter tails are not the same thing
Component
Where it is
Why it changes the repair
Fascia board
Typically the vertical finish board along the edge of the roof, often behind a gutter.
May be replaceable in sections if its connections and supporting wood are sound.
Soffit / eave underside
The underside of the roof overhang; some assemblies include ventilation.
Damaged soffit can conceal trouble above it and may involve vent or finish restoration.
Rafter tail
The projecting end of a roof rafter supporting the eave area.
Rot here involves a structural member and needs an appropriate repair plan.
Roof-edge flashing / drip edge
Water-management details near the roofing edge.
Incorrect or failed drainage details can continue wetting newly repaired wood.
Exact assemblies vary by house. The U.S. Department of Energy’s Building Science Education guidance on drip edge explains why roof-edge detailing matters for moisture management; it is not a substitute for locally applicable plans or code requirements.
Signs to watch for
Six clues the roof-edge wood deserves attention
01 / Repeated paint failure
Paint peels in the same place
Recurring bubbling or flaking may mean water is reaching the wood beneath the coating.
02 / Dark edges
Stains at joints and ends
Discoloration near miter joints, board ends or gutter fasteners deserves investigation, though staining alone does not diagnose rot.
03 / Shape changes
Warping or a sunken board
Noticeable deformation, gaps or crumbling ends suggest the surface may no longer be intact.
04 / Gutter movement
Loose or pulling hangers
A sagging gutter may indicate poor attachment, damage to the backing board or a drainage problem.
05 / Eave underside
Open seams or damaged soffit
Gaps and loosened soffit panels can expose adjacent areas to pests or more weathering.
06 / After rain
Drips where they should not be
Runoff behind gutters, wet wall streaks or leaks at roof-wall junctions can help locate the moisture pathway.
These are inspection prompts, not a diagnosis from appearance. Water stains, insect damage, fungal decay and weathered paint can look similar.
Peak’s own photo archive
Roof-edge work is more than the board you see
Peak’s project media library includes photographs identified as eaves repair in Granite Bay and fascia work in Rocklin. They offer useful context for the kind of exterior carpentry addressed here, without claiming every pictured area suffered the same cause or repair scope.
During a real estimate, the question is whether the damage ends at the fascia or extends to the gutter attachment, soffit, sheathing, rafter tails or adjacent finish. That distinction determines whether a localized scope makes sense.
Peak Construction archive: roof-eaves work labeled Granite Bay. Photo context; the individual repair scope is not independently priced or diagnosed here.
Follow the water
Why fascia and eaves can rot again after being painted
A / Overflow
Clogged or poorly draining gutters
Overflow can repeatedly wet fascia and fascia-board ends. Check drainage and the connection between gutter, drip edge and board.
B / Transitions
Roof-edge or flashing gaps
Water may travel along a joint or behind a finish and become visible away from its entry point.
C / Finishes
Exposed end grain or failing joints
Unprotected cuts, open caulk joints or aging coatings can let repeated moisture reach susceptible wood.
Where a roof meets a wall, water diversion can matter as much as the visible trim. The U.S. Department of Energy provides a useful reference for kick-out flashing and roof-wall intersections. Not every home has the same roof detail, and repairing one board will not automatically correct a leak elsewhere.
Repair decisions
Repair, replace a section, or investigate the structure?
Maintenance / refinishing
If the existing wood is sound and the issue is only surface-coating failure, proper preparation, sealing and repainting may be reasonable after the moisture source is addressed.
Scope: sound wood, finish issue
Localized fascia replacement
If decay is limited to an accessible nonstructural board and nearby components remain sound, replacing a section and correctly restoring the roof-edge details may be practical.
Scope: damaged fascia, sound support
Expanded eave repair
If deterioration affects soffit, rafter tails, roof-edge sheathing or connections, the repair may require opening more material and coordinating structural or roofing-related work as appropriate.
Scope: concealed or supporting members
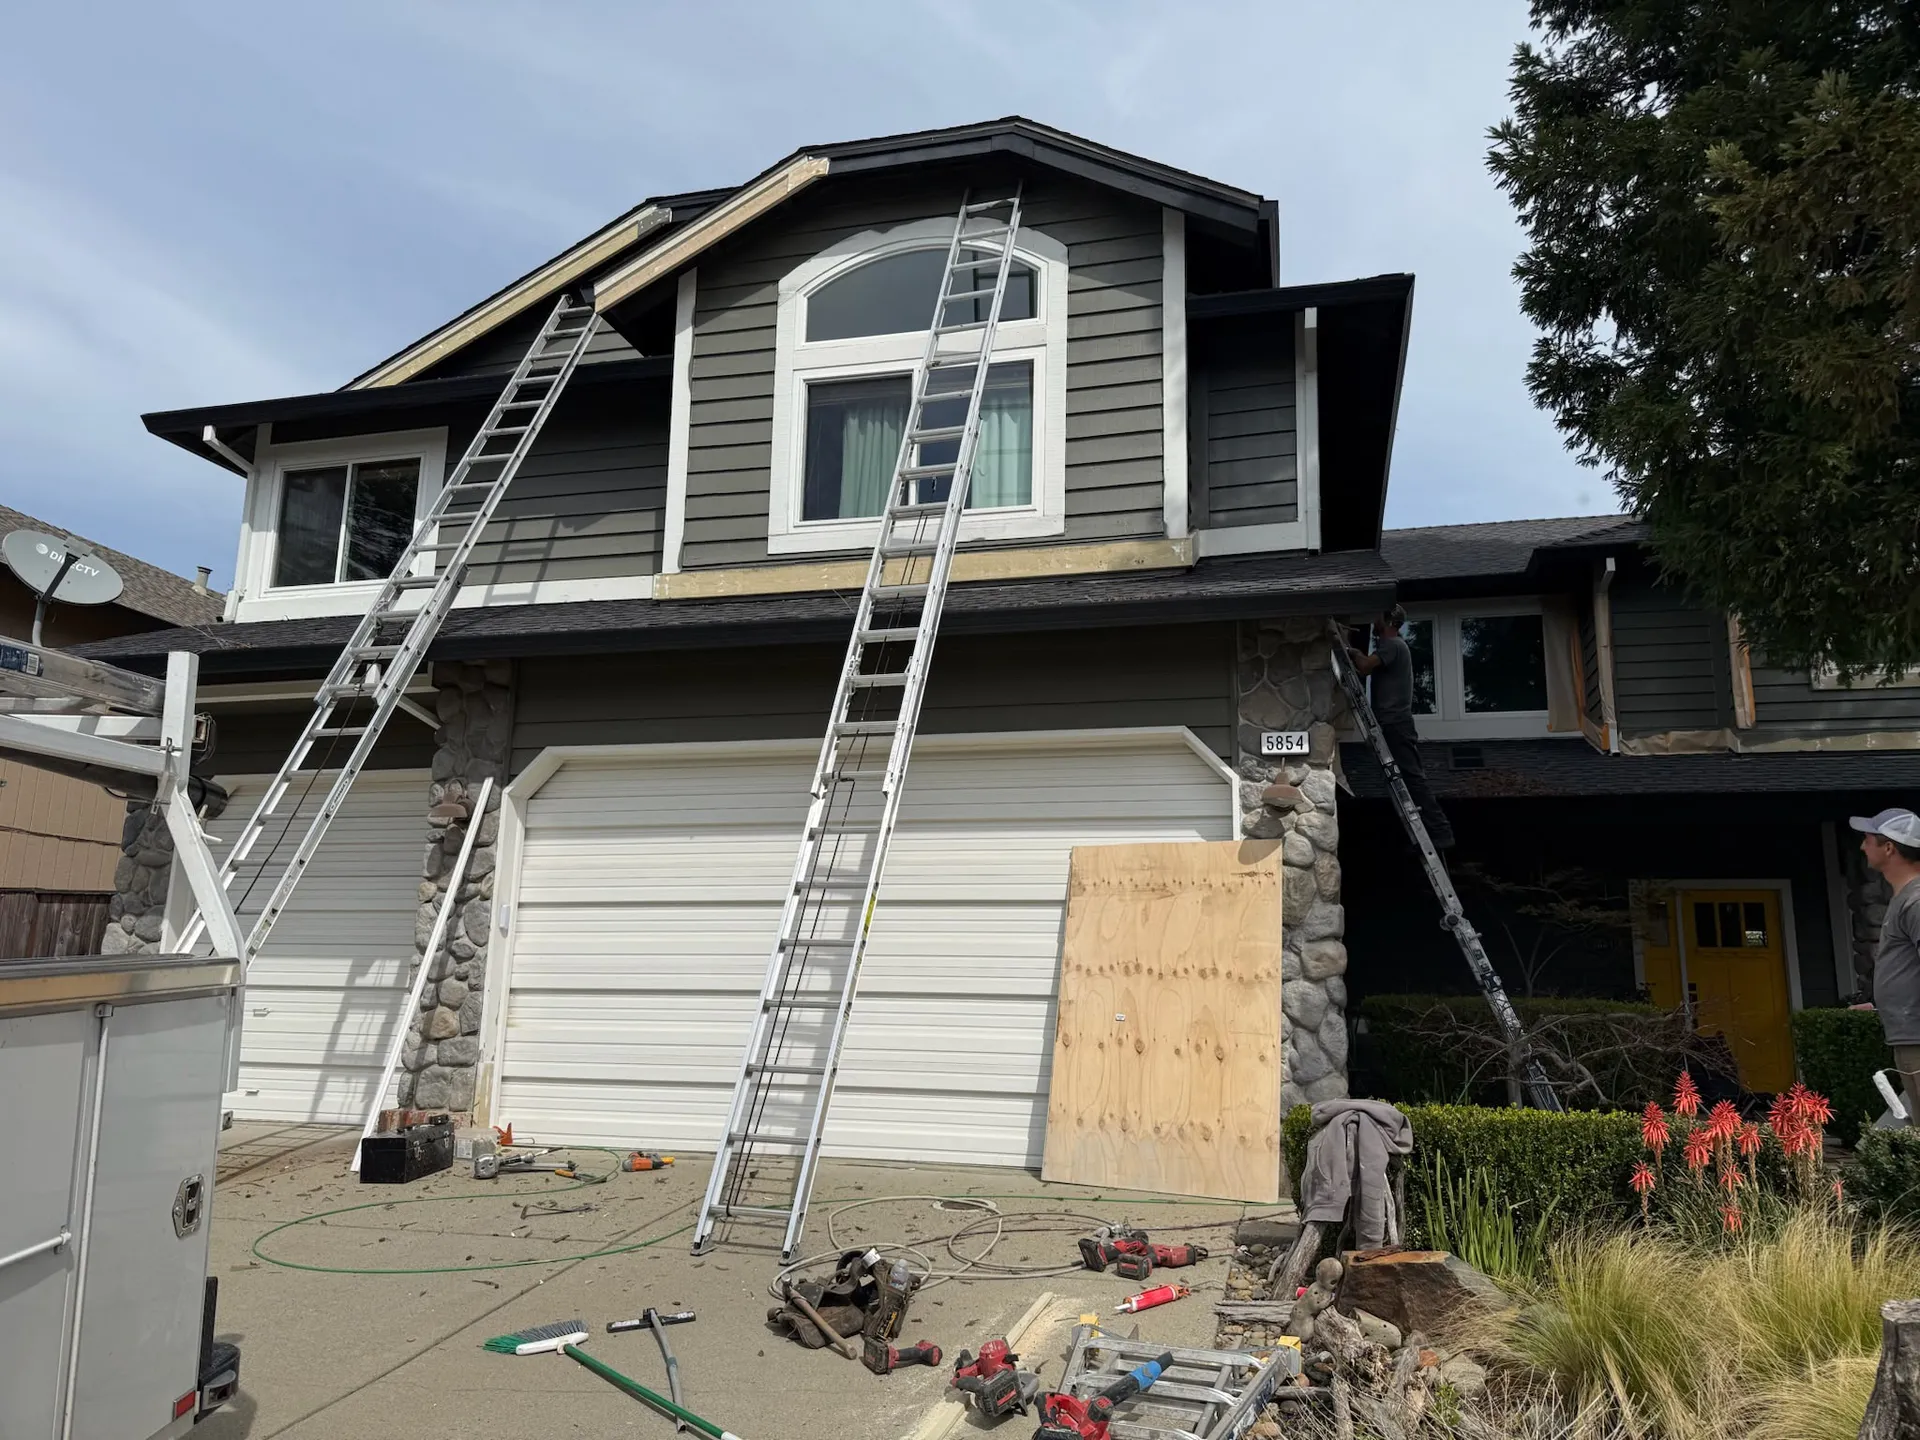
Peak Construction photo archive: second-story fascia work. Height and safe access can change the project plan.
Why access and height matter
Roof-edge repairs often require ladders, scaffolding or other appropriate access equipment. At a second-story eave, safely reaching the work, protecting the surrounding finish and removing or reinstalling gutter sections can affect how the repair is organized.
Never rely on a visual estimate alone to approve structural work. When load-bearing members may be affected, ask how the contractor will verify and document the repair scope. Peak can coordinate applicable permits and inspections where required.
Before choosing a contractor
What should a fascia or eaves repair estimate include?
A reliable estimate should make visible damage and potential concealed damage two separate parts of the conversation.
The specific roof-edge location, board lengths and affected surfaces
Access setup and temporary gutter removal/reinstallation, if needed
The materials to be removed and replaced, including whether supporting members are in scope
Review of the likely moisture source and any related flashing or drainage work
Primer, paint, trim transitions and site cleanup included or excluded
How concealed damage, change orders and additional approvals are handled
Any permit, inspection and warranty terms relevant to the actual work
What about cost?
A short piece of fascia and a multi-level roof-edge repair cannot sensibly share one advertised price. Access, gutter handling, adjacent decay and finishing all influence a real bid.
For context on how exterior wood-decay estimates are formed—and clearly labeled third-party pricing references—read Peak’s Dry Rot Repair Cost in Sacramento guide.
Does peeling fascia paint mean the wood is rotten?
No. Paint failure can have multiple causes. Repeated moisture exposure, soft or crumbly wood, warping or compromised connections are stronger reasons to request an inspection. Appearance alone does not establish the repair scope.
Can you replace fascia without replacing the roof?
Sometimes. If the surrounding roof-edge assembly and support members are sound, a board can be replaced locally. A leaking roof edge, damaged decking or rafter tail may require a wider repair plan.
Do gutters have to be removed for fascia replacement?
Where a gutter is mounted to the affected board, a section may need temporary removal or support. The contractor should explain the access and reinstallation plan in the estimate.
Is a rotted rafter tail the same as a rotted fascia board?
No. A fascia board is commonly an exterior finish/attachment member; a rafter tail is part of a structural roof framing member. Structural repairs need a scope appropriate to the specific condition.
Can rot return after the wood is replaced?
Yes, if the moisture pathway remains. Repainting or replacing a board does not resolve overflowing gutters, failed flashing or an ongoing roof leak by itself.
Does Peak handle fascia and eaves repair in the Sacramento area?
Yes. Fascia and eaves are within Peak’s exterior repair scope, serving North Highlands and Greater Sacramento. For address-specific availability, submit your ZIP code and photos through the estimate form.
Send photos of the fascia, eaves and nearby gutters. Peak can review your request and explain the next step toward a free estimate, without pretending that a picture reveals every hidden condition.
Photo and editorial note: the Rocklin fascia and Granite Bay eaves images come from Peak Construction’s existing labeled project-media library; no invented invoice totals, customer testimonials or structural diagnosis have been added. This article is general homeowner information, not an inspection. Return to the Peak Construction homepage or contact Peak for a property-specific review.
Dry Rot Repair Cost in Sacramento: What Affects the Price?
A soft window trim board is a different job from rotted framing behind an exterior wall. Here is how repair costs are discussed locally, what changes an estimate, and how to get a scope that reflects the actual damage.
Published Sacramento-area cost guides suggest that a limited exterior trim repair may fall in the hundreds to low thousands of dollars, while work extending into siding, sheathing, framing or structural components can cost several thousand dollars or more. Those figures are third-party examples, not Peak Construction prices or project quotes. The difference usually comes down to how far the deterioration extends, what must be removed to reach it, and what must be rebuilt and finished.
For example, Vitalii Builders’ 2026 Sacramento guide publishes roughly $300–$800 for small repairs and $2,500–$8,000+ for more extensive or structural work. Good Life Inspections’ 2026 guide gives higher ranges of $500–$1,500 for minor work and $5,000–$10,000+ for severe repairs. Different definitions of scope explain why published ranges should not be mistaken for a fixed rate card.
If paint is peeling or wood feels soft, the visible patch does not necessarily describe the repair. Water may have reached adjoining trim, sheathing or framing. A useful estimate identifies what is known, what remains concealed, and how the contractor will handle discoveries.
Budget context, not a quote
Published repair ranges—and how to read them
These are broad guideposts synthesized from the two independently published sources above. Their categories overlap, methods are not identical, and an actual proposal may fall outside the ranges.
Typical scope
Published guidance
What often changes it
Limited trim / small exterior wood repair Fascia section, a window surround or isolated corner trim
Approximately $300–$1,500 across the cited guides
Height, access, matching details and whether damage stops behind the finish
Localized siding, deck or larger exterior section
Approximately $800–$5,000 across the cited guides
Removal area, additional sheathing, weather barrier, replacement material and finishing
Concealed or structural repair Joists, rim boards, framing or a wider damaged assembly
Approximately $2,500–$10,000+ across the cited guides
Load-bearing work, temporary support, permit needs and the damage discovered after opening
Source methodology: broad ranges combine reported examples from Vitalii Builders and Good Life Inspections, both linked above. The numbers are illustrative, not a statistically measured Sacramento average, formal bid, or Peak pricing. A photo alone cannot confirm hidden structural conditions.
Seven cost drivers
What actually changes a dry rot repair estimate?
The most useful pricing question is not simply “How many feet are damaged?” It is “Which components need to be safely accessed, removed, repaired, protected and finished?”
01 / Extent
Surface trim vs. hidden framing
Replacing a board is different from opening the wall to remove damaged sheathing, studs or other structural members.
02 / Access
Height and working space
A reachable first-floor corner typically needs less access setup than a second-story eave or confined exterior area.
03 / Assembly
What must be removed
Siding, flashing, trim, window details and connected finishes may have to be temporarily removed to reach the affected wood.
04 / Moisture
Fixing why water got in
Repairing damaged wood without correcting an active leak, failed joint or drainage issue may leave the cause in place.
05 / Materials
Matching the repair
Wood species, siding profile, trim dimensions, compatible flashing and finish materials affect procurement and installation.
06 / Structural scope
Support and approvals
Structural members, elevated decks or substantial changes may require more planning, support, engineering or permits where applicable.
07 / Finish
Close-up and painting
A complete estimate should explain sealing, water protection, surface finishing, cleanup and whether adjacent painting is included.
Real Peak Construction work
Why a small visible problem can become a larger repair
In a documented El Dorado Hills dry rot repair, Peak opened exterior wall areas and evaluated concealed deterioration at lower walls and window transitions. The project demonstrates a crucial pricing distinction: the repair boundary follows the condition of the materials found after opening, not just the visible stain or damaged edge.
The project gallery documents the repair process. It does not publish an invoice or final project price, so we are not presenting an invented “Peak example cost.”
Peak Construction project photo: opened exterior wall at an El Dorado Hills repair. Source: published Peak project archive.
Scope before price
How a useful dry rot estimate is built
A practical proposal should make clear the difference between conditions visible during the initial review and conditions that may only become known after controlled opening.
1
Document
Review the damaged area, nearby openings, finishes and signs of moisture entry.
2
Define
Explain the apparent repair area, access requirements and materials likely to be involved.
3
Confirm
Where concealed damage is possible, document how additional scope is reviewed and approved.
4
Repair
Remove unsound material, rebuild the approved area and complete the required protection and finish.
Actual work sequence, investigation and approvals depend on the project and signed agreement. An initial inspection may not expose every concealed condition.
Example of exterior wood and framing work from Peak Construction’s own image collection.
Compare estimates fairly
What should a written wood rot repair quote include?
Which wood, trim, siding or framing members are included
Demolition, disposal and access requirements
Moisture-source correction and weather protection within scope
Replacement materials, fasteners, flashing and finish
Permit or inspection responsibilities, where required
How concealed damage and change orders are approved
Payment schedule, completion conditions and written warranty terms
Repair or replace?
Can the damaged area be repaired without replacing the entire exterior?
Sometimes. Localized deterioration around a window, a fascia board or one section of siding may allow a targeted repair after the damaged material is removed and surrounding components are assessed. A wider moisture problem, recurring failure or damaged framing can require more extensive rebuilding.
There is no responsible percentage threshold that decides this from a photograph. The choice depends on the actual condition, available access, the existing assembly and whether a durable, code-compliant repair can be completed. For material-specific options, see siding repair vs. replacement and the main siding repair and replacement service.
For decks, especially near connections and supports, review the deck repair vs. rebuilding guide. Structural or safety concerns deserve prompt professional evaluation.
Why Sacramento weather and property details matter
Exterior wood is vulnerable where rain, irrigation, roof runoff or poorly managed water repeatedly wets an assembly. Common places to look include window and door transitions, roof edges, lower siding and deck connections. The source of moisture matters more than the marketing term “dry rot”: decay generally depends on conditions that allow wood to stay damp.
Peak serves North Highlands and the Greater Sacramento area, including Sacramento, Roseville, Rocklin, El Dorado Hills and nearby communities. Service availability and a repair estimate depend on the specific address and work.
Homeowner questions
Dry rot cost FAQ
Can I get a price from photos?
Photos can help identify the location and visible condition, but they cannot confirm the extent of concealed deterioration. A useful estimate may require an on-site review and a plan for unexpected conditions.
Why can a small damaged board cost more than expected?
Working height, opening and closing adjacent finishes, weatherproofing and hidden damaged materials may matter more than the visible length of the board.
Does insurance cover dry rot repair?
Coverage depends on policy terms and the cause of damage. Gradual deterioration is often treated differently from a sudden covered event. Ask your insurer to review the specific claim; Peak cannot determine coverage.
Should I replace all siding if one section has rot?
Not automatically. The answer depends on the extent of moisture damage, condition of adjacent materials and whether the repaired assembly can be properly protected and matched.
Will a dry rot repair need a permit?
It depends on the jurisdiction and scope, especially if structural components are affected. Confirm requirements with the applicable building department and contractor before work begins.
Send the location, a few photos and what you have noticed. Peak can review the request and explain how to proceed toward a written repair estimate. California CSLB #1098148.
Editorial transparency: The published price examples are from third-party 2026 Sacramento-area guides, not Peak Construction invoices. Project descriptions and photographs reference Peak’s existing public case archive. This guide is general information, not an inspection, engineering report, insurance determination or binding estimate. For Peak services and contact information, return to the Peak Construction homepage.
This documented Sacramento installation shows a wall in progress, with the weather-resistive layer and new horizontal siding visible in the same frame. It is a useful look at the parts homeowners should discuss before the wall is closed.
Peak Construction’s archive identifies this as a fiber-cement siding installation in Sacramento. The available photograph documents work in progress.
LocationSacramento, CA
Project typeFiber-cement siding installation
Visible stageWall preparation and installation
EvidencePeak project photo archive
What the record confirms
A Sacramento wall photographed during installation
The project archive confirms the city, the fiber-cement siding scope and an installation-progress stage. The photograph shows why a siding estimate must address the wall behind the finish, the siding layout and every opening or transition—not only the number of visible boards.
Evidence boundary: the archive does not name the siding manufacturer, fastener schedule, flashing products, insulation work, permit number or final completion date. It also does not include a separate finished-facade photograph. We do not infer those details from appearance.
From open wall to finished exterior
Four parts of a responsible siding installation scope
1
Prepare the wall
Remove the agreed finish area, evaluate the exposed substrate and address conditions that should not be concealed by new siding.
2
Build the siding system
Coordinate the water-resistive layer, starter and course layout, joints, fasteners, clearances and cut-edge treatment for the selected product.
3
Detail openings
Integrate windows, doors, corners, penetrations and horizontal transitions so water is directed back to the drainage plane.
4
Close and finish
Complete the courses, trim and finish work, then verify alignment, clearances, penetrations and the agreed punch-list items.
Wall preparation
New siding should not hide an unresolved wall condition
Once existing cladding is removed, the contractor can evaluate what is actually exposed: sheathing or other substrate, visible framing conditions, penetrations and the continuity of the drainage layer. The correct response depends on what is found. A solid surface may need only preparation; damaged material may require a documented repair before the new siding system continues.
This is also the moment to coordinate any approved work that becomes impractical after the wall is closed. That does not mean every siding project includes framing, insulation, wiring or plumbing changes. Those items should appear in the written scope only when they are actually evaluated, authorized and appropriate to the project.
Openings and transitions
The vulnerable details are usually where materials meet
Windows and doors
Trim, flashing, sealant, siding and the water-resistive layer must work together. Caulk alone is not a substitute for a drainage detail.
Joints and corners
Layout affects appearance, fastening and water management. Joint treatment and clearances must follow the selected product instructions and applicable code.
Penetrations
Vents, hose bibs, lights and other wall penetrations need a defined transition back to the weather-resistive layer before the siding is closed.
Why the exact product matters: fiber-cement manufacturers publish product-specific requirements for clearances, flashing, fastening, joints and cut edges. The contract should identify the selected siding and installation instructions rather than relying on a generic “fiber cement” label.
More fiber-cement siding details from Peak’s photo archive
Newly added photographs show the siding surface, trim relationships and exterior wall details homeowners often ask about. These images are supplementary visual references; the library filenames do not independently establish that every view is from this exact Sacramento address.
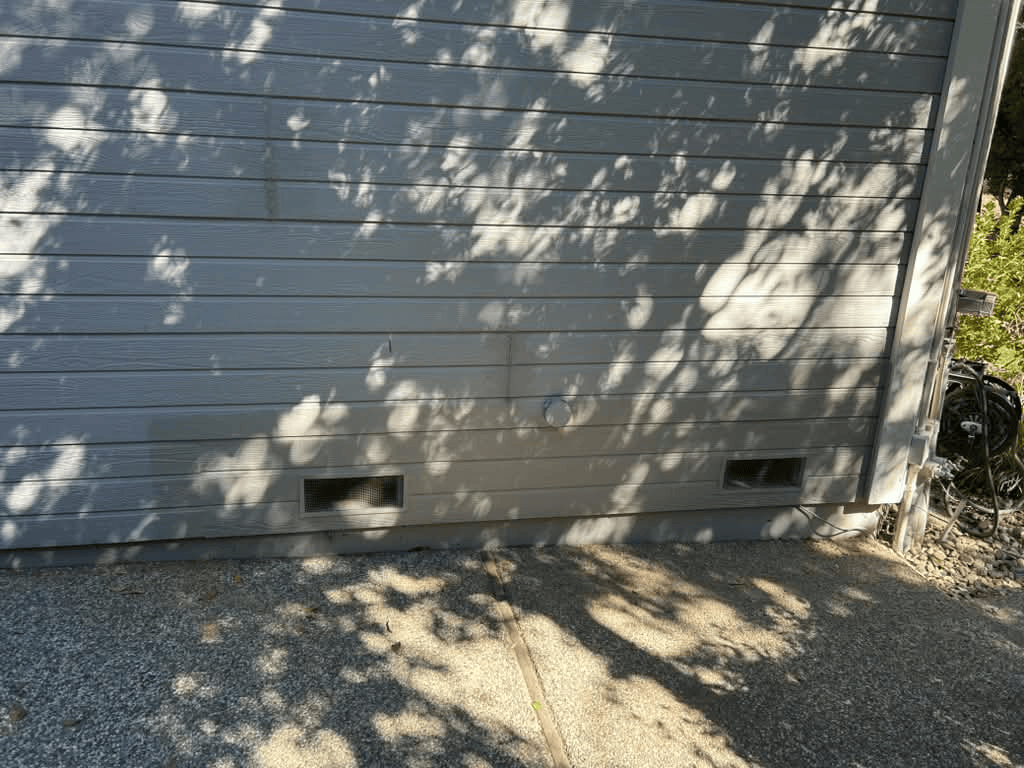
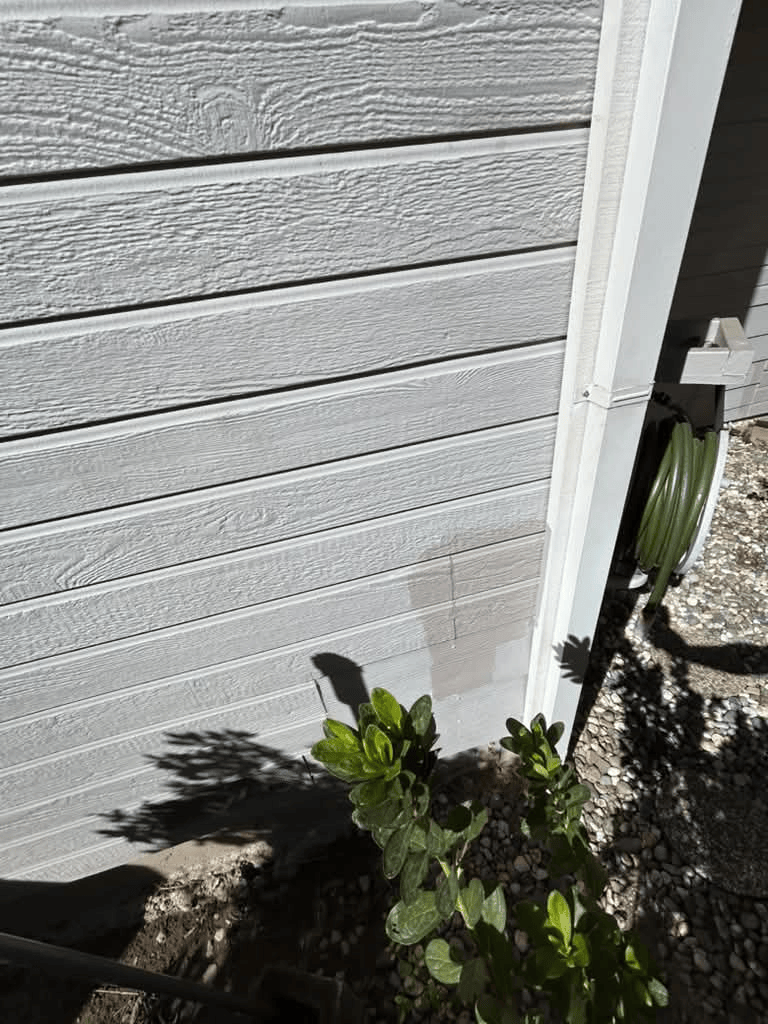
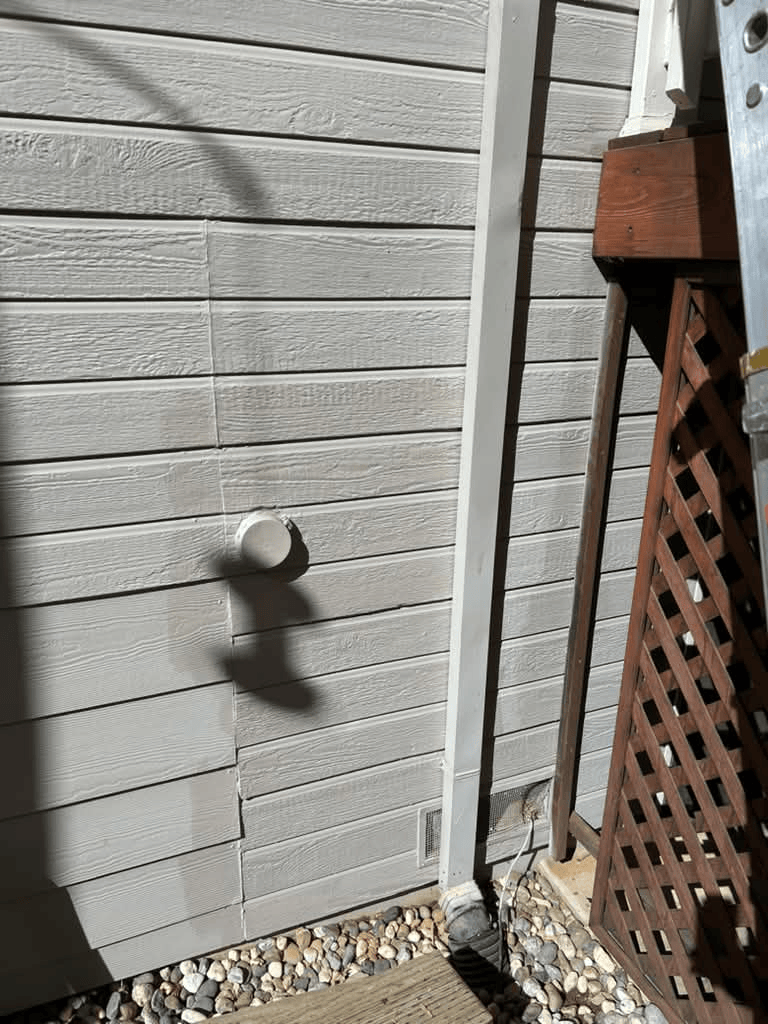
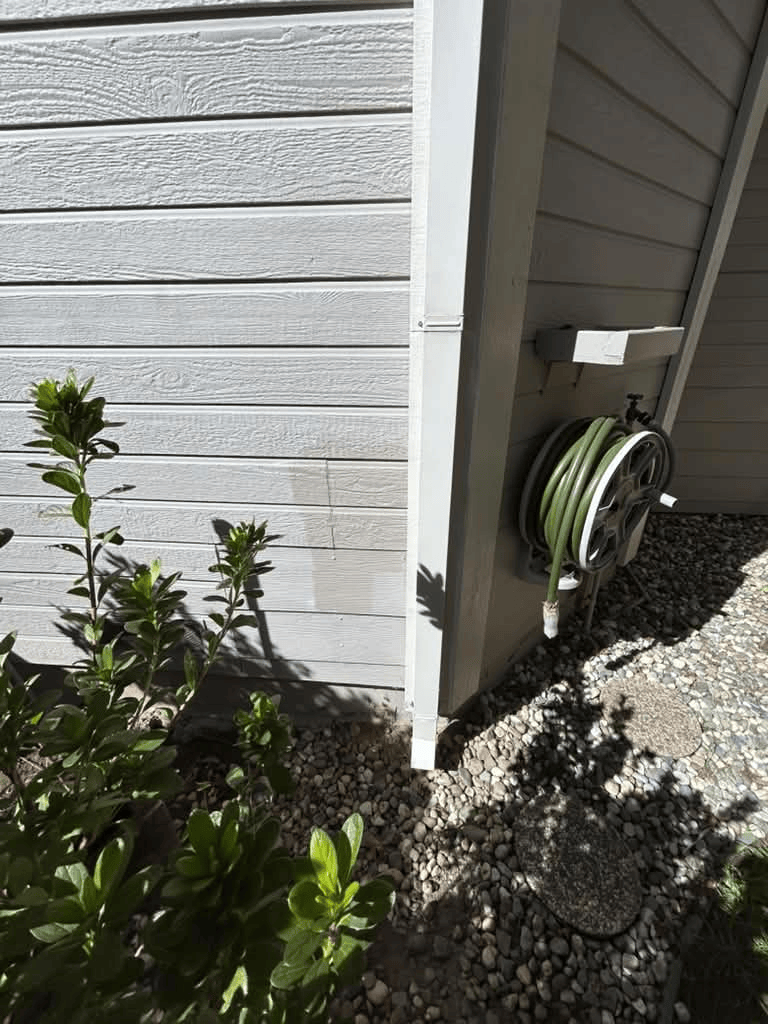
Siding across the garage wall — wider view of the horizontal courses.Siding and light-colored trim — a closer look at their junction.Exterior service pipe and adjacent siding — an important wall transition.Siding beside a mounted hose reel and landscaping.
Photos: Peak Construction media archive, added October 2026. The documented Sacramento installation-progress photo above remains the primary project evidence.
Finished result
What a final walk-through should verify
The available Sacramento image documents installation in progress, not the finished elevation. A final project review should therefore rely on the actual completed wall and the approved scope. Homeowners can use the following checklist when the work is ready for review:
Visual continuity
Consistent course lines
Clean trim relationships
Agreed finish and touch-up
Water-management details
Openings and penetrations completed
Required flashing and clearances visible where applicable
Sealant used only in specified locations
Closeout
Punch list documented
Site cleanup completed
Permit and inspection records provided when applicable
Sacramento permitting
Siding work is listed as permit-required by the City
The City of Sacramento currently lists siding among projects that require a building permit. Its electronic plan-check guidance also lists residential siding as a minor-permit category that generally does not require plan review, while historic properties and material changes have additional forms. The exact path depends on the property and scope, so permit responsibility should be settled before work begins.
For applications submitted on or after January 1, 2026, the City states that the 2025 California Building Standards Codes and applicable local amendments apply.
How are openings, joints and penetrations handled?
Project controls
Who handles permits and inspections?
How are change orders approved?
What final documentation is provided?
Frequently asked questions
Sacramento fiber-cement siding FAQ
Does Sacramento require a permit for siding?
Yes. The City lists siding among work requiring a building permit. Residential siding is generally handled as a minor permit without plan review, but property and scope can change the requirements.
Can new siding go directly over a damaged wall?
New cladding should not be used to conceal material that has already lost serviceability. The exposed wall conditions and the written scope determine what must be repaired before installation continues.
What fiber-cement brand was used on this project?
The available archive identifies a fiber-cement siding installation in Sacramento but does not name the manufacturer or product line. We do not guess a brand from the photograph.
Should siding be repaired in sections or replaced across the wall?
That decision depends on the damage boundary, condition of the substrate, ability to integrate the drainage system, product availability and the homeowner’s finish expectations. See our detailed Sacramento siding repair vs. replacement guide.
Continue your research
Siding repair and replacement
Review Peak’s siding scope for the Greater Sacramento area.
Send Peak Construction the property location, photos of the affected elevations and a short description of the work. We can review the visible conditions and discuss the next step for an on-site estimate.
A completed deck designed for a compact residential outdoor space
This documented Peak Construction project shows a completed deck in Fair Oaks, California. The photograph provides a clear record of the finished walking surface and perimeter enclosure without making unsupported claims about concealed framing or product brands.
Peak Construction’s project archive identifies this completed residential deck in Fair Oaks.
LocationFair Oaks, CA
Project typeResidential deck construction
SettingCompact enclosed outdoor area
EvidencePeak project photo archive
The short answer
What this Fair Oaks deck project confirms
The archive confirms a completed deck construction project in Fair Oaks. The finished image shows evenly organized decking boards, a continuous usable surface and a perimeter enclosure fitted to a narrow residential outdoor area.
What the photo does not prove: exact decking species or brand, joist size and spacing, footing details, waterproofing layers, fastener specifications or permit history. Those items must come from plans, contracts and site-specific inspection—not from appearance alone.
Reading the finished space
Three details that matter in a compact deck layout
Usable circulation
In a narrow yard or patio, the deck should preserve practical paths between doors, seating, equipment and the rest of the outdoor area. Layout decisions affect how the space works every day.
Edges and transitions
Where decking meets walls, doors or perimeter screening, the design must account for drainage, clearances and access. A clean-looking edge is not a substitute for a correctly detailed assembly.
Serviceable construction
Boards and visible finishes receive most of the attention, but long-term performance depends on the concealed structure, connections and moisture management below them.
Project planning
How a deck scope should be defined before construction
A useful deck proposal does more than name a square-foot price. It explains what is known, what must be verified in the field and which decisions may change the final scope. For an existing property, that usually begins with the house connection, grade, drainage, access and any existing structure that will remain or be removed.
1
Evaluate
Review the site, access, elevation changes, drainage and relationship to the home.
2
Define
Confirm the intended footprint, stairs, guards, surface, transitions and finish expectations.
3
Verify
Determine which plans, engineering details and Sacramento County approvals apply.
4
Build
Sequence demolition, structure, inspections and finish work around an agreed scope.
Estimate checklist
Questions a Fair Oaks homeowner should ask
What is included?
Demolition and disposal
Structural framing and connections
Decking, stairs and guards
Flashing and drainage details
Permit and inspection responsibilities
What remains unknown?
Concealed damage at the house
Condition of existing supports
Underground or access constraints
Requirements triggered by final dimensions
How are changes handled?
Documentation before extra work
Written change authorization
Photos of concealed conditions
Clear impact on cost and schedule
Local requirements
Deck permits in Fair Oaks and Sacramento County
Fair Oaks is served by Sacramento County for building permitting. The County’s current Building Permits and Inspection FAQ lists decks among typical projects that require a permit, while also directing property owners to the applicable California Building Code or Residential Code provisions and the County for a final determination.
Permit requirements depend on the deck’s height, size, attachment, structural work and the specific property. Confirm the project scope before construction begins rather than assuming a small or replacement deck is exempt.
The right scope depends on the structure below the boards
A worn walking surface does not automatically mean the entire deck needs replacement. At the same time, new boards cannot correct unsafe framing, failed connections or moisture damage at the house. The decision should follow a component-by-component evaluation of the support system, connections, stairs, guards and decking.
Sacramento County lists decks among typical projects requiring a permit. The final answer depends on the specific design and property, so confirm requirements with the County before work starts.
Can Peak match an existing deck layout?
Matching or adapting an existing layout depends on the condition of the structure, current code requirements, available materials and how the deck connects to the home. An on-site review is the right starting point.
What decking material was used in this project?
The available archive identifies the Fair Oaks deck project but does not document a product brand or material specification. We do not infer one from color or appearance alone.
What should I send for an estimate?
Send the property location, several wide and close-up photos, approximate dimensions, the problem you want to solve and any known permit or plan information. Peak can then discuss the next step for an on-site estimate.
Continue your research
Deck building and repair
Review Peak’s deck service scope for the Greater Sacramento area.
Send Peak Construction a short description, photos and approximate dimensions. We can review the visible conditions and discuss the next step for an on-site estimate.
This documented Peak Construction project follows the work from selective removal through the repaired facade. It shows why the condition behind siding—not only the visible surface—defines a responsible repair scope.
Exterior damage often concentrates where windows, trim, siding, flashing and sealant meet. From the outside, a deteriorated edge or failed joint may look localized. The actual repair boundary cannot be confirmed until affected finish materials are removed and the substrate is visible.
Why this area needed to be opened
Window openings interrupt the drainage plane and create several transitions in a small area. Trim, siding courses and sealant can hide the edges of deterioration. Opening the affected zone lets the contractor inspect the sheathing and the transitions that must be sound before new exterior finishes are installed.
That is the practical difference between a cosmetic patch and a durable siding and trim repair.
Opening and findings
What the exposed wall showed
The project photographs show the siding and trim removed around a large window, with the wall substrate and the edges of the opening visible. They also show that the repair had to coordinate several parts of the exterior assembly rather than replace one isolated board.
Finish materials
Siding and trim were removed far enough to create a workable repair boundary and expose the adjoining surfaces.
Underlying substrate
The opened area allowed the condition behind the facade to be checked before it was covered again.
Transitions
Window edges, trim joints and siding courses had to be rebuilt as a coordinated exterior detail.
Important: a photograph can document the work, but it cannot diagnose another home. The extent of any repair depends on what is found after the affected area is safely opened.
Repair scope
From selective removal to a finish-ready facade
The documented sequence supports a focused repair—not a claim that every wall needs full replacement. The scope follows the opened condition and restores continuity around the window and adjacent siding.
Remove affected siding and trim
Take off the materials required to expose the repair area without unnecessarily disturbing sound sections.
Inspect the opened assembly
Evaluate the substrate, opening edges and adjoining transitions once they can be seen.
Replace damaged material as needed
Rebuild the affected substrate and backing before installing finish components.
Reinstall siding and trim
Match the existing horizontal course pattern, rebuild the window trim and prepare joints and fasteners for exterior finish.
Materials visible in the project archive
What went into the repair
The photographs support the use of replacement wall substrate where opened, matching horizontal lap siding, replacement trim boards, and exterior preparation at joints and fasteners. Exact brands, quantities and concealed flashing components are not identified in the archive, so this case study does not invent them.
The repaired facade shows aligned horizontal siding, rebuilt trim and finish preparation at repaired locations.
Localized repairs were blended into the existing siding pattern.Window trim detail after rebuilding and exterior preparation.
The result
A repaired assembly—not a surface-only patch
The finished project photographs show consistent siding courses, reconstructed trim around the openings and prepared repair locations ready for the final coating sequence. More importantly, the work was based on the condition revealed behind the exterior finish.
When a localized repair can make sense
If damage is confined and compatible materials can be integrated correctly, a focused repair may preserve sound sections of the facade. When deterioration is widespread, materials are failing across multiple elevations, or a reliable transition cannot be created, broader replacement may be more appropriate.
Permit needs vary with the work. Roseville directs building-permit applications through its online system and notes that requirements depend on the project scope. Homeowners should confirm requirements before work begins using the City of Roseville Building Division guidance.
Can damaged siding be repaired without replacing the whole elevation?
Sometimes. A focused repair depends on the extent of damage, the condition of the substrate, the ability to integrate compatible siding and trim, and whether the weather-resistant transitions can be restored correctly.
Why remove siding if the problem appears to be trim?
Trim, siding and the window opening overlap. Limited removal may be necessary to see the substrate, reach sound material and rebuild the transition instead of sealing over a concealed problem.
Does a photo show whether repair or replacement is needed?
No. Photos can document visible symptoms and completed work, but the final scope should be based on an on-site evaluation and, when appropriate, selective opening.
Need siding or trim evaluated in Roseville?
Send photos and a short description. Peak Construction can review the visible condition and discuss the next practical step.
What the exterior showed—and what opening the wall revealed
This documented Peak Construction project shows why exterior dry-rot repair is defined by the condition behind the finish, not by the size of the stain or damaged edge visible from outside.
Exterior finishes were removed in multiple areas so the repair boundary could be evaluated.
LocationEl Dorado Hills, CA
Project typeExterior dry-rot repair
Primary areaLower walls and window transitions
EvidencePeak project photo archive
The short answer
The visible damage was only the starting point
Once the exterior assembly was opened, deterioration could be evaluated across the sheathing, lower wall framing and transitions around windows. The repair therefore had to follow sound material—not an arbitrary surface outline.
Important: These photographs document one El Dorado Hills project. They show a repair process, not a visual diagnosis for another home. Concealed conditions vary by assembly and moisture path.
1 · The problem
Exterior deterioration near the base of the wall
The project involved damaged exterior wood at the lower wall and around window-area transitions. From the finished surface, it was not possible to see whether the issue stopped at trim and finish materials or continued into the assembly behind them.
Why this area matters
Window, trim and wall transitions combine several materials and joints.
Water can travel behind a finished surface before visible damage appears.
Paint or patching cannot restore wood that has already lost serviceability.
2 · Opening and findings
Selective demolition established the real repair boundary
Exterior finish, trim and affected sheathing were removed in controlled sections. That made it possible to inspect the surrounding assembly and continue opening only where needed to reach serviceable material.
1
Document
Photograph the visible condition and adjacent transitions before opening.
2
Open
Remove finish materials carefully enough to expose concealed edges.
3
Trace
Follow deterioration through sheathing and framing until sound material is reached.
4
Rebuild
Replace affected components and prepare the wall for exterior restoration.
After removal, the lower wall showed deterioration beyond the original visible edge.The opened lower wall exposed framing cavities and the relationship between windows, sheathing and exterior finish.Replacement framing and sheathing were installed where the damaged assembly had been removed.
3 · Repair scope and materials
Rebuild the assembly, not just the surface
Documented scope
Removal of affected exterior finish and trim in the repair areas
Exposure and evaluation of sheathing and lower wall framing
Replacement of non-serviceable wood components
Installation of replacement sheathing and preparation for exterior finish restoration
Materials visible in the archive
Replacement dimensional framing lumber
Structural wood sheathing
New backing and attachment surfaces at opened transitions
Integration points for the restored weather barrier, trim and exterior finish
Exact product brands and quantities are not stated because they are not documented in the available archive.
4 · Result
A defined repair area and a rebuilt wall assembly
The documented result is a repair area opened to sound material, with deteriorated components removed and replacement framing and sheathing installed. The photographs capture the structural rebuilding stage before the final exterior finish was restored.
For homeowners, the practical lesson is simple: a responsible dry-rot proposal should explain what can be confirmed before opening, what remains concealed, and how additional discoveries will be documented.
Local project planning
Dry-rot repairs in El Dorado Hills
Permit requirements depend on the final scope. El Dorado County states that structural changes typically require permits and provides current guidance through its Building Division. Some properties may also have architectural-control requirements. Confirm requirements for the specific parcel and repair before work begins.
A weathered deck is not automatically a teardown. A clean-looking deck is not automatically safe. The real question is whether the deck’s structural core—from the ledger and joists to the posts and footings—still provides a trustworthy load path.
This guide explains how the decision is made. It is not a remote safety inspection or engineering opinion. A deck with movement, a loose guard, a pulling ledger or visibly failed support should be kept out of service until evaluated.
The Short Answer
When Can a Deck Be Repaired Instead of Rebuilt?
Repair is a reasonable path when deterioration is localized, the primary structure can be inspected, and the remaining ledger or support system, joists, beams, posts and footings are sound enough to keep. Rebuilding becomes the safer and more predictable choice when damage or movement runs through several parts of the load path—or when so much framing must be replaced that the old deck no longer provides meaningful value.
A deck may be a repair candidate when
surface damage is limited to boards, trim or a small area;
one or a few framing members are affected but adjacent wood is sound;
posts, beams and footings are stable and serviceable;
the ledger connection can be verified—or the deck is independently supported;
limited hardware defects can be corrected in sound wood;
the moisture source can be fixed as part of the same scope.
Rebuilding deserves serious consideration when
decay affects multiple joists, beams, posts or connections;
the ledger or house rim is deteriorated, pulling away or cannot be trusted;
footings have moved, settled or no longer provide reliable support;
corrosion is widespread rather than isolated;
several members are undersized, over-spanned or poorly connected;
a roof, hot tub, outdoor kitchen or major redesign will add new loads.
Do not make the decision from the walking surface alone. Worn boards can sit on a repairable frame. New boards can hide a dangerous ledger, decayed joist ends or corroded connectors. The decision belongs to the structure beneath the surface.
Follow the Load
The Deck Works as One Structural System
People and furniture load the decking. The decking transfers that load to joists, the joists to beams, the beams to posts, and the posts to footings and soil. An attached deck also depends on its connection to the building and on lateral resistance. A weak link anywhere in that chain can control the repair decision.
Decking
Joists
Beams
Posts
Footings
Soil
This is why replacing boards and railings is not a structural assessment. A useful inspection follows the load path, checks how water reaches each connection and records anything that cannot be verified without opening the assembly.
Inspection Sequence
What Should Be Checked Before Pricing a Repair?
Site and footings
Look for settlement, erosion, uplift concerns, soil contact and footings that appear too small, shallow or displaced.
Posts and bases
Check plumb, bearing, splitting, decay at the bottom, water traps and whether metal bases keep wood separated from concrete or soil.
Beams and bearing
Verify that beams bear correctly, built-up members act together and connections are not relying on nails or screws used in the wrong direction.
Joists and hangers
Inspect spans, joist ends, notches, holes, blocking, hangers and the fasteners actually installed—not only the metal connector.
Ledger and house rim
For an attached deck, verify attachment, flashing, water management and the condition of the building material receiving the connection.
Guards and stairs
Test stability and review posts, rails, stringers, treads, landings and connections. These are safety-critical, not cosmetic accessories.
Suspicious wood should be probed where decay often begins: exposed end grain, beam tops, joist ends, fastener penetrations, ledger interfaces, stringers and post bases. The inspector should also look for sway, bounce, leaning posts, gaps at the house, displaced beams, loose guards and sinking supports.
Just as important, the inspection should trace the water source. Replacing deteriorated wood without correcting failed flashing, trapped debris, poor drainage or repeated wetting only resets the clock.
The finished surface is only one part of the system; framing, bearing and connections determine whether the structure can be retained.New loads, geometry changes and guard or stair revisions can move a project beyond a simple repair.
A Practical Decision Matrix
What Common Deck Conditions Usually Mean
Observed condition
What must be verified
Repair may still work when
Rebuild signal
Worn, cracked or soft deck boards
Joist tops, spacing, fasteners and water traps below
The frame is sound and the new decking is compatible with the existing layout
Decay extends into joists or the framing is not suitable for the replacement material
One damaged joist
Cause, adjacent members, bearing and connector condition
The defect is isolated and a complete structural repair is accessible
Several joists or the supporting beam show the same deterioration
Loose or corroded hanger
Wood around the connector and correct fastener type
Sound wood remains and the connector detail can be corrected
Corrosion is systemic or fastener holes and wood fibers no longer provide reliable purchase
Deck pulls away from the house
Ledger, house rim, flashing, bolts and lateral connections
Only after the attachment and receiving structure are proven repairable
Ledger or house rim is decayed, inaccessible or broadly compromised
Leaning post or sloping deck
Footing movement, post base, beam bearing and soil conditions
A localized foundation correction is practical and the frame has not been distorted
Multiple supports have moved or the deck cannot be stabilized without extensive dismantling
Loose guard or failing stairs
Post anchorage, rim/joist support, stringers, landings and geometry
Sound structure exists for a code-appropriate connection
Safe attachment requires rebuilding the surrounding frame or stair system
Component by Component
Repairability Is Not the Same for Every Part of a Deck
Decking
Boards are commonly replaceable, but a heavier or different product may require a review of joist spacing, spans and fasteners.
Joists and beams
Localized repairs can be possible when bearing and surrounding wood remain sound. Broad decay or multiple framing errors changes the economics quickly.
Posts and footings
A post is only as dependable as its base and footing. Soil contact, movement or poor bearing can make a surface-only repair meaningless.
Ledger and flashing
This is one of the highest-consequence areas on an attached deck. It must manage both gravity loads and water at the building connection.
Guards
A solid-looking rail can still have weak post attachment. Repair requires a trustworthy load path into sound framing.
Stairs and landings
Stringer cuts, attachment, tread condition, handrails and bottom landings work together. Piecemeal work is not always the safest scope.
A Repair Decision Also Has a Jurisdiction Question
A Sacramento mailing address does not always identify the permitting authority. The property may be in the City of Sacramento, unincorporated Sacramento County or another incorporated city in the region. The authority having jurisdiction decides whether the proposed work requires a permit, plans, current-code upgrades or engineering.
The City of Sacramento’s plan-check guidance identifies decks and patio covers as projects that generally require plans, subject to limited exemptions. Its residential accessory-structure guidance describes a narrow permit exemption for certain detached decks no more than 200 square feet, no more than 30 inches above grade and not serving a required exit. Sacramento County’s permit FAQ also lists decks among typical permit projects.
City guidance says the 2025 California Building Standards Codes apply to new permit applications beginning January 1, 2026. An older deck may have been legal when built but still fall short of today’s prescriptive details. Repairing one component does not automatically mean every part must be rebuilt, but the approved scope and any required upgrades need to be confirmed for the actual property.
When an engineer may be appropriate
Engineering becomes more likely when capacity cannot be verified, deterioration affects major structural members, the geometry is unusual, the deck carries a roof or concentrated load, cantilevers are large, foundations are uncertain or the proposed work falls outside prescriptive code provisions.
Cost Without Guesswork
Compare a Complete Repair With a Complete Rebuild
A low repair price is not useful if it excludes the moisture source, structural connections or likely concealed work. A rebuild price is not automatically better if most of the existing frame is sound and accessible. The comparison should begin with one inspection and two clearly defined outcomes:
Minimum complete repair: everything needed to leave a safe, durable and permit-ready result—not only the visible patch.
Full rebuild: demolition, disposal, foundations or retained supports, framing, decking, guards, stairs, permits and finishes defined on the same basis.
Then compare more than the total: remaining service life, percentage of old structure retained, hidden-condition risk, permit or engineering complexity, warrantyability and whether the layout or intended loads are changing. Repair economics are strongest when a high percentage of the frame is proven sound and the defect is concentrated. Rebuild economics improve as affected zones multiply and the repair requires extensive dismantling to reach them.
Need a property-specific deck scope?
Send the ZIP code, photos, approximate age if known, and note any movement, soft areas, loose guards or changes you want to make.
Property ZIP code, permitting jurisdiction if known, approximate deck age and whether it is attached to the house.
Symptoms
Soft boards, bounce, sway, leaning posts, loose guards, water staining, rust, settlement or gaps at the house.
Project goal
Safety repair, new decking, layout change, stairs, guard update, waterproofing, patio cover or a future concentrated load.
Photos are useful for triage, but they cannot prove concealed ledger attachment, joist-end condition, footing adequacy or the extent of decay. A responsible contractor should say what was inspected, what remains concealed and what would require exploratory opening.
About Peak Construction
Deck Repair and Rebuilding Across Greater Sacramento
Age alone does not decide it. An older deck may be repairable if the foundations, primary framing and critical connections are sound or can be corrected within a defined scope. A newer deck may need major work if attachment, drainage or structural details failed early.
Can I replace deck boards without rebuilding the frame?
Often, but the frame should be inspected first. Joist tops, ends, hangers, beams, posts, footings and the ledger need to be checked, and the framing must suit the span and fastening requirements of the new decking.
Does one rotten joist mean the whole deck must be rebuilt?
Not necessarily. One isolated member can sometimes be repaired or replaced. The important questions are why it decayed, whether adjacent material is sound, and whether the repair can restore a reliable load path without hiding a broader problem.
Is a freestanding deck safer than an attached deck?
It removes the house-ledger connection, but it still depends on adequate footings, posts, beams, lateral stability and connections. “Freestanding” is not a substitute for correct structural design.
Does deck repair require a permit in Sacramento?
Many deck projects do. Limited exemptions may apply to certain small, low, detached decks, but the exact property jurisdiction and scope control the answer. Confirm requirements before work starts.
When does a deck need an engineer?
Engineering may be needed when loads or capacity are uncertain, major members are deteriorated, geometry is unusual, foundations are questionable, or the deck will support a roof, hot tub, outdoor kitchen or other concentrated load.
Can a contractor decide repair versus rebuild from photos?
Photos can identify areas to investigate, but they cannot verify concealed attachment, hidden decay, footing depth or structural capacity. A dependable decision requires an on-site inspection and sometimes limited exploratory opening.
Keep the Sound Structure—Replace What Cannot Be Trusted
Peak can evaluate the visible condition, define what needs further investigation and build a repair or rebuilding scope around the actual deck.
This article is homeowner education, not a structural inspection, engineering opinion, code determination or project quote. Prescriptive guides do not replace local requirements or a qualified evaluation of the actual property.
Repair makes sense when the defect is truly local and the wall behind it is sound. Replacement makes sense when the failure is repeated, widespread or tied to a larger water-management problem. The important decision is not simply which siding looks better—it is whether the exterior wall can still do its job.
The cost figures below are early planning ranges, not a Peak Construction quote. Actual scope depends on measurements, access, material, concealed conditions and permit requirements.
The Short Answer
When Should Sacramento Siding Be Repaired—and When Should It Be Replaced?
Choose repair when one impact-damaged panel, trim board or limited leak area can be opened, corrected and tied back into sound surrounding materials. Consider replacement when multiple areas are failing, matching is impractical, sheathing or flashing problems extend beyond one location, or repeated repairs are buying time without correcting the cause.
Repair is usually the better starting point when
damage is confined to a small, accessible area;
the weather-resistive barrier and sheathing are sound outside that area;
the water source can be corrected within the repair;
matching siding and trim are available;
the remaining siding still has useful service life.
Replacement becomes more practical when
cracking, swelling, warping or finish failure appears across elevations;
leaks repeat around several openings or wall transitions;
hidden dry rot, termite damage or failed sheathing is widespread;
patches would be conspicuous or technically difficult to integrate;
the project is already opening the wall for insulation or major flashing corrections.
There is no honest universal “25% rule.” A small area beside a badly flashed window can expose a larger wall problem, while a visibly dramatic impact break may remain localized. The repair boundary should follow evidence, not a sales percentage.
Why Sacramento Is Different
Heat, Seasonal Rain and Termites Stress Different Parts of the Wall
Sacramento’s long, hot summers put ultraviolet exposure, finish durability and thermal movement under pressure. The cooler rainy season tests window heads, door openings, roof-to-wall intersections, utility penetrations, deck ledgers and lower siding courses. A wall can look dry on inspection day while still containing damage from an earlier leak.
Local siding problems should therefore be evaluated as water-management and assembly problems—not blamed only on age or ambient humidity. Failed paint may be cosmetic. Failed paint plus swelling, staining, soft trim or recurring caulk separation can indicate that water is reaching material behind the visible cladding.
Termites are also locally relevant. UC Statewide IPM reports that western drywood termites occur into California’s Central Valley and that subterranean termites are widespread throughout the state. Their guidance also explains that concealed infestations can be difficult to define without professional investigation. If pest evidence is present, construction repair and licensed pest/WDO evaluation are related but separate scopes.
Openings
Windows and doors combine trim, flashing, sealants, siding and framing. A soft board does not show how far the issue extends.
Transitions
Roof-wall intersections, deck ledgers, corners and material changes concentrate drainage and fastening details.
Lower walls
Soil, paving and sprinkler exposure can keep bottom courses wet and create both decay and pest risk.
Inspection Before Pricing
What Must Be Checked Behind the Siding
Siding is the outer layer of a wall system. A durable proposal needs to account for the drainage plane, flashing, sheathing, framing, insulation and the details that connect them.
Identify the failure mechanism. Is the damage from impact, heat movement, chronic wetting, failed flashing, pest activity, inadequate clearance or ordinary finish weathering?
Define the visible boundary. Note every soft area, failed joint, bowed panel, crack, stain and opening that may be connected.
Use controlled exploratory opening when justified. Removing a limited amount of siding or trim can show whether sheathing and framing are sound.
Separate known work from concealed conditions. The contract should explain what is included and how additional discoveries will be documented, priced and approved.
Correct the water source before closing the wall. New siding over failed flashing or a broken drainage plane only hides the original problem.
Window and trim transitions often require inspection beyond the visible finish.A replacement scope should define the material, wall preparation, flashing and finishing details—not only the brand.
Matching is unavailable or surrounding material is brittle/failing
Peeling or faded finish
Normal weathering, poor preparation or moisture
Prepare and refinish after moisture is ruled out
Swelling, delamination or repeated coating failure is widespread
Soft trim below a window
Failed joint, sill or flashing detail
Open the local area, repair damage and rebuild drainage details
Similar failures occur at several openings or sheathing damage connects them
Bowing, buckling or loose siding
Fastening, movement, substrate or moisture problem
Possible if confined and the substrate is sound
Broad substrate distortion, wrong installation pattern or systemic movement
Pellets, tubes or galleries
Possible termite activity
Licensed pest/WDO evaluation plus localized construction repair if extent is known
Multiple concealed areas or structural members are affected
Recurring leak at roof or deck connection
Flashing/WRB transition failure
Focused reconstruction if the boundary is limited
The transition affects a long wall run or repeated patches have failed
Full Panels vs. a Section Repair
Should You Replace Complete Siding Sheets or Only the Damaged Section?
It depends on what the siding is doing, what remains sound behind it and whether a new horizontal joint can be detailed correctly. Complete sheets usually produce the cleaner, more durable assembly. A limited section repair can still be responsible when the damage is truly local and the existing wall above and below the cut is serviceable.
Complete-sheet replacement is stronger when
the opened area suggests concealed moisture or decay may extend beyond the visible edge;
the panel is part of a braced-wall or shear-resisting assembly that must retain a specific joint and fastening pattern;
the wall needs broader access to inspect sheathing, framing, wiring or plumbing penetrations;
the owner wants to evaluate insulation and air-sealing improvements while the wall is open;
a horizontal patch line would be conspicuous or difficult to integrate with the weather-resistive barrier;
fewer joints, a more uniform finish and longer service life justify the added material and labor.
A Z-flashing section repair can make sense when
the damaged area is small, accessible and clearly bounded after opening;
the panel, sheathing and framing above the repair are sound;
the repair can shed water over the lower material without interrupting the drainage plane;
the new joint can be supported, fastened and finished as required for that wall assembly;
a matching full-height panel is unusually costly or difficult to source;
the owner understands the appearance and service-life tradeoff of adding a horizontal joint.
Peak field rule: compare the finished wall assembly—not only the price of one sheet. The real comparison includes inspection access, concealed repairs, WRB continuity, flashing, blocking, fasteners, finish matching and the number of new joints left in the wall.
Structural role: verify the assembly before cutting a panel
Not every siding product is automatically the home’s shear wall. However, some structural wood panels and panel-siding assemblies do contribute to bracing or lateral resistance. If they do, panel edges, blocking and the fastening schedule must follow the approved plans, applicable code and the product manufacturer—not a universal rule copied from another project. A six-inch edge nailing pattern is common in some wood structural panel assemblies, but it is not a blanket requirement for every siding repair.
What full-wall exposure can add to the project
Removing full panels gives the crew a wider view of the sheathing and framing and can reveal dry rot, failed penetrations or earlier patchwork that was invisible from outside. It also creates an opportunity to review insulation, air sealing and the weather-resistive barrier before the wall is closed. Those upgrades are not automatic: the permitted scope, existing wall construction, energy requirements and any electrical or plumbing work still need to be confirmed for the property.
Where Z-flashing fits—and where it does not
A horizontal section repair normally depends on properly lapped Z-flashing or another approved water-shedding detail above the lower panel. The cut height should follow the actual damage, required clearances, available material and the assembly details. There is no universal code rule that makes every repair below 12 inches acceptable. Likewise, claims that 9-foot or 10-foot sheets always cost exactly two or three times as much as 8-foot sheets should be treated as supplier- and job-specific pricing, not a fixed market rule.
The 2025 California Building Code exterior-wall provisions require exterior wall coverings, joints and fasteners to be installed as an integrated, weather-protective assembly and in accordance with approved manufacturer instructions. That is why the right answer may change after the damaged area is opened.
2026 Planning Ranges
What Siding Repair or Replacement May Cost in Sacramento
There is no responsible price based only on the home’s floor area. A two-story house with gables, offsets and many openings can have much more wall area—and much more detailed labor—than a simple one-story home with the same square footage.
Scope
Typical planning quantity
Early planning range
What moves the number
Small localized repair
About 20–100 sq. ft.
$750–$5,000
Access, matching, trim, flashing and hidden damage
Partial elevation / section
About 300–800 sq. ft.
$4,500–$22,000
Demolition, two-story work, openings, sheathing and finish
Complete re-siding
Roughly 1,500–2,800 sq. ft. of cladding on many 1,500–2,500 sq. ft. homes
These are broad 2026 planning scenarios derived from the supplied research—not advertised prices, bids or guarantees. Peak Construction prices work after evaluating the actual property and agreed scope.
Material-level planning bands
For early comparison, the research uses approximate installed bands of $7–$13/sq. ft. for vinyl, $9–$16 for engineered wood, $10–$18 for fiber cement, $10–$18 for stucco, $12–$24 for natural wood and $15–$30+ for metal. Those figures become misleading if bids do not include the same demolition, WRB, flashing, trim, sheathing assumptions, permits, finishing and cleanup.
Need a property-specific scope?
Send the ZIP code, a short description and photos. Peak will confirm whether the project fits a localized repair or broader replacement review.
A balanced option for heat, dimensional stability and low pest susceptibility. It still requires correct clearances, flashing, fastening and finish.
Stucco
Well suited to many Sacramento homes and strong for fire performance, but cracks, weeps, penetrations and window flashing must be detailed correctly.
Engineered wood
A wood-look middle ground. Performance still depends on finish maintenance, edge protection, clearances and water management.
Vinyl
A cost-conscious option that must be allowed to expand and contract. Extreme heat, dark colors and impact exposure deserve careful product review.
Natural wood
Architecturally appropriate for some homes but the most demanding for coating, moisture control, clearances and termite inspection.
Metal
Premium durability and low combustibility, with higher cost and more demanding expansion, fastener and galvanic-compatibility details.
For properties in a Wildland-Urban Interface, material name alone is not proof of compliance. The actual product or wall assembly must meet the applicable California requirements; the State Fire Marshal’s building-material listings address exterior wall siding and sheathing. “Noncombustible,” “Class A” and “WUI compliant” are not interchangeable shortcuts.
Jurisdiction matters. A Sacramento mailing address can be inside the City, in unincorporated County territory or in another incorporated city such as Elk Grove, Folsom, Citrus Heights or Rancho Cordova. The authority having jurisdiction—not the mailing label—controls the permit pathway. City guidance also says the 2025 California Building Standards Codes apply to new applications beginning January 1, 2026.
Full tear-off can create a valuable chance to inspect the drainage plane, air sealing and wall insulation before the new exterior is installed. Whether a particular alteration triggers energy requirements depends on the permitted scope and the current code. Ask for the insulation option before the contract is finalized; it is much harder to add after the wall is closed.
Scope and Contract Review
What a Strong Siding Proposal Should Include
A useful proposal says more than “remove and replace siding.” Compare bids only after each contractor is pricing the same wall.
Defined assembly
Product/profile, finish, demolition, disposal, WRB, flashing, joint support or blocking where required, fasteners, trim, caulk, paint and manufacturer clearances.
Hidden-condition process
Exploratory work, sheathing/framing allowances, unit pricing or change-order method, pest protocol and photo documentation.
The California Contractors State License Board advises homeowners to verify license information, put changes in writing and use a detailed payment schedule. For most home-improvement contracts, CSLB states that a down payment cannot exceed $1,000 or 10% of the contract price, whichever is less, subject to the limited exception described by CSLB.
Older homes require another check before demolition. EPA’s Renovation, Repair and Painting program covers many paid projects that disturb painted surfaces in pre-1978 housing. Older cementitious exterior products may also require material testing before they are cut or removed.
Questions worth asking before you sign
What caused the siding to fail, and how will that source be corrected?
How will you verify the sheathing behind the damaged area?
Does the price include tear-off to the weather barrier or only an overlay?
How will windows, doors, roof-wall intersections and deck connections be flashed?
What happens if dry rot or termite damage is discovered?
Who pulls the permit, and is final sign-off part of project closeout?
Which product and workmanship warranties are included—and what do they exclude?
A Better Project Sequence
Six Steps From Symptom to Finished Wall
Document
Photograph affected areas and note leaks, sprinkler exposure, timing and earlier repairs.
Diagnose
Identify whether the problem is finish, cladding, flashing, pest, sheathing or framing related.
Measure
Price actual wall area, elevations, openings, trim and access—not only house floor area.
Compare scopes
Make bidders include the same tear-off, WRB, flashing, repair allowances and finish.
Permit and build
Use the correct jurisdiction, document hidden discoveries and follow approved changes.
Close out
Keep final inspection, photos, invoices, product data and written warranty records.
About Peak Construction
Siding and Exterior Repair Across Greater Sacramento
Peak Construction evaluates siding as part of the exterior assembly. The service scope includes localized siding and trim repair, broader replacement, fiber-cement siding where appropriate and connected dry-rot work found during the project. Review documented Peak projects or see the Greater Sacramento service area.
Should I replace complete siding sheets or only the damaged section?
Use complete sheets when the wall needs broader inspection, the panel contributes to a braced or shear-resisting assembly, hidden damage may extend farther, or a new horizontal joint would compromise appearance or water management. A Z-flashing section repair may work when the damage is truly local, the surrounding assembly is sound and the new joint can be supported, flashed and fastened correctly. There is no universal 12-inch cutoff; the repair boundary follows the actual wall condition and approved assembly details.
Does faded siding need to be replaced?
Not automatically. Fading can be a finish issue. Replacement becomes more likely when fading is combined with widespread cracking, swelling, delamination, brittleness or repeated coating failure.
Should new siding be installed over old siding?
Overlay can be appropriate in some assemblies, but it prevents direct inspection of the wall beneath. With unexplained leaks, dry rot, pest evidence or questionable flashing, removal usually provides much better information.
Is fiber cement the best siding for Sacramento?
It is a strong all-around candidate because of dimensional stability, sun performance and low pest susceptibility, but no product compensates for poor flashing, missing clearances or an incorrectly built drainage plane.
Does siding replacement require a permit in Sacramento?
City of Sacramento guidance lists siding as permit work, and Sacramento County lists siding/stucco as well. Confirm the exact property jurisdiction and scope because exemptions and submittal paths can differ.
How long does siding replacement take?
The construction duration depends on wall area, stories, openings, trim, material and hidden repairs. Permit processing is separate from field duration, so the schedule should identify both.
Can a contractor give an exact price from photos?
Photos can support triage, but they do not show concealed sheathing, framing, flashing or pest damage. A firm price needs measured quantities and clearly stated assumptions.
Repair the Right Area—or Replace for the Right Reason
Tell Peak what you are seeing, where the property is located and whether the problem has happened before. Add photos if available.
This article is homeowner education, not an engineering opinion, pest inspection, hazardous-material survey, code determination or project quote. Requirements and conditions must be confirmed for the specific property and scope.